

Method Studios’ Simon Carr and VFX team tell about building vast new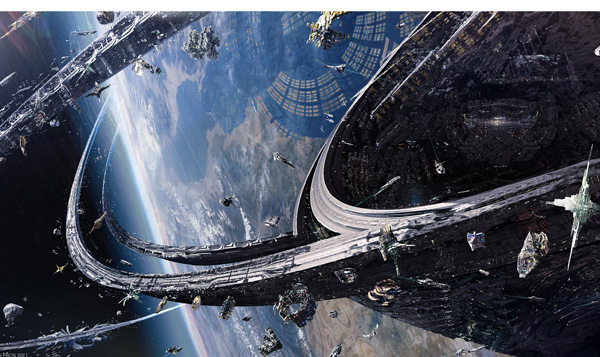
worlds, robotic characters and zero gravity FX for sci-fi fantasy feature
‘Jupiter Ascending’.
Method Touches the Stars for ‘Jupiter Ascending’ |
|
Contributing to the science fiction fantasy film‘Jupiter Ascending’,Method Studioscreated massive environments on alien planets, built full CG spaceships, landscapes and futuristic traffic systems, and brought fascinating hybrid robot-human characters to life. The work included large scale 3D digital matte paintings and CG set extensions, character animation, water simulations and other effects work. |
 |
|
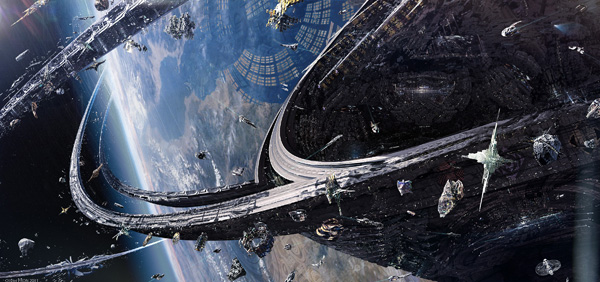
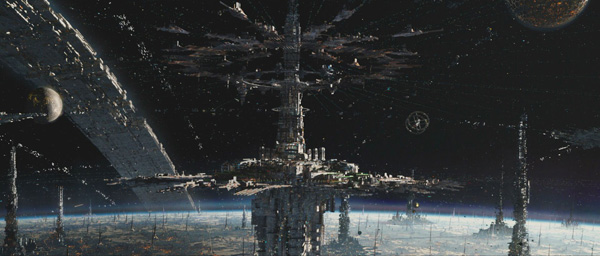
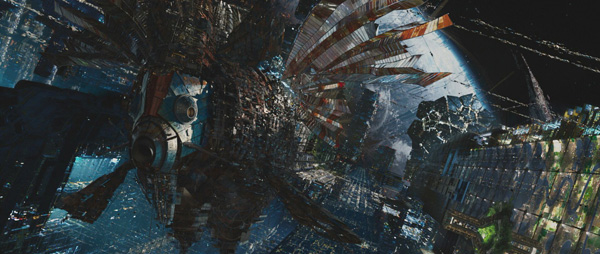
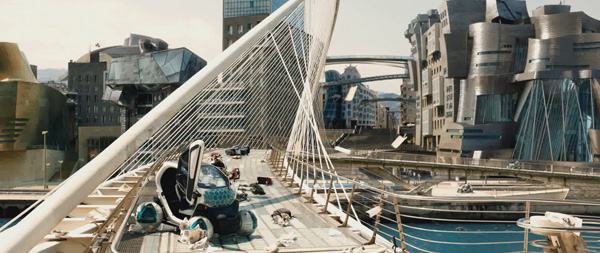
Approaching OrousAs the audience approaches the planet of Orous with the story’s heroine Jupiter for the first time, Method’s task was depicting the infrastructure of a complex, ancient society on a massive scale. To maintain a coherent style across the environment, they adopted a historical back story supplied by the production. “Our understanding of the Orous environment was that it had grown up over millennia with a double set of rings accreting around the home planet, but with no clear plan. Rather than being a homogenous whole, the idea was to represent many different cultures and designs to give a sense of chaotic growth over time,” said Simon Carr. |
 |
 |
|
Concept artistsPhilippe Gaulier, Paul ChandlerandOliver Pronhad created a series of beautiful, detailed concept art, which Method followed quite closely. “On the whole, because we were working within a smaller VFX pipeline, we followed a workflow of reprojected digital matte paintings in order to achieve that complexity and scale, especially for larger objects set in the mid and background. Working over base geometry, the matte painters would create a range of structures and textures. In the mid-ground, these were then often enhanced with some full CG objects. Traffic Jam“The massive fish-shaped 'junk ship' was an example of a full CG asset that passes close to camera and, therefore, was modelled and textured in very high detail. We then gave it a range of interior lighting to help convey the scale and its huge stained glass fins for a sense of grandeur, in keeping with the film's overall vision,” Simon said. |
 |
|
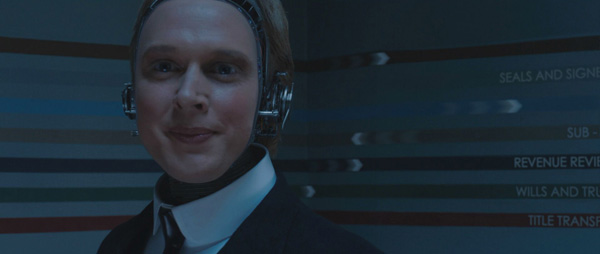
”Because of the scale of the world we were creating, many of the decisions about travel speed and directions for the ships were established in shot with animation and layout. We looked at a more technical approach, but the distances were usually so huge that this became unwieldy and it was easier to work with what looked good. In the Orous system, the planet itself is about ten times the size of the Earth, which gives you an idea of the distances we were working on.” Robot FriendsMethod carried out CG enhancements to some intriguing live action robotic characters, Gemma and Advocate Bob, who are hybrids between a human and a robot. Shot on green screen, not only did they need to match on-set lighting for invisible integration, but also involved prosthetic enhancement work that had to be very precise to achieve a good composite. |
 |
|
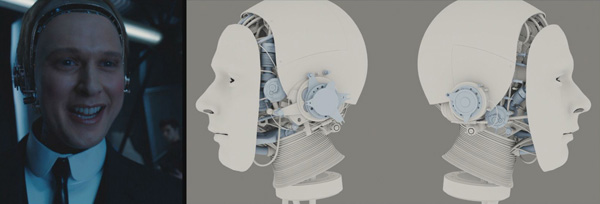
“We had a pretty clear concept from the beginning and jumped straight into modeling, figuring out all the internal mechanics of the gears, pistons and fibre optics. It was good fun to work out which bits are moving and how they related to the head. Texturing was done in Mari and all of the rendering in Arnold, which worked very well. The final look was brushed metal of various types, like the internal workings of a watch. “Fibre optic cables where also added that would react to the actor's facial expression, so if there was some erratic eye movement, the fibre optics around his face would speed up and increase in intensity,” Jon explained. “This was a simple set-up, for which we created various animated textures using Maya particles and then ran them down the UVS of the fibre optics at different speeds. We rendered these out as AOVs, or ambient occlusion volumes, and had a set-up in Nuke to build up the layers of fibre optic lights.” Expanding MethodTracking was one of the more challenging tasks. Tracking the head and face was simple enough because tracking markers had been applied on set, but they also needed to track the shoulders and torso in order to attach the base of the CG neck. With no markers or clear points to track, the match movers had to do much of the clean-up by hand. |
 |
|
Edgy AnimationDescribing the animation of the robotic characters, Jon said, “With the tracks in place we were able to get the rig in and to see how the neck was moving. This took a bit of fixing from shot to shot because we had to counter-animate the neck to reduce unnatural movement and wobble. As we progressed through the sequence, the animation for gears and pistons developed into Bob's emotional response to the situation. He starts off eager to help, but then gradually gets more agitated and nervous as they get caught up the back-and-forth. He ultimately ends up bribing an official to get what he wants, at which point the animation calms down. “After the first renders we added a metal frame to make a distinct edge at the edge of the face where live action meets the CG head. Using the Lidar to rebuild the actor’s face, we rendered a plastic-looking version of the skin and then blended through to his face, doing a special pass in compositing to enhance the transition. |
 |
|
Zero GravityThroughout the story, the artists created a zero gravity energy beam effect, known in the film as a ‘fermionic beam’. Caine, for example, uses this energy to power his hover boots, and in one sequence Jupiter is seen waking up, floating in a fermionic bed. FX Supervisor at Method,Jonathan Daviessaid, “This effect is found in scenes from other vendors, too, where the beam was used to move large and small scale objects around, so we had to respond to any visual changes from other sections of the film. However, the bed sequence gave us some extra challenges. We had to generate the beam itself, but then create Jupiter's hair and a complex dress she was wearing too, both moving within the zero gravity beam. The hair and dress had to match live action elements in the surrounding shots and also blend invisibly with practical portions within our shots. “To create the beam I used a low resolution water simulation, pushed around from the movement of any objects inside the beam. The beam was rendered in Mantra. A volumetric layer was warped using the points from the water simulation and various lighting layers and useful elements were passed to 2D. The fluid points were also rendered to give a subtle bubble-like effect to highlight the movement and light interaction. |
 |
Subtle Turbulence“The cloth simulation of Jupiter's dress was a pretty tricky task as the lack of gravity and subtle turbulence was giving us some awkward shapes. Many carefully placed forces were needed to keep her covered up as well as keep the dress fitting flatteringly to her figure. We used Maya nCloth to run the cloth simulations because we had more experience with nCloth than Houdini's cloth tool, and it allowed quick tests while dress model and UV changes were being made.” Attached to the cloth was a complex pattern of ribbons mixed with scattered gemstones. All the techniques they tried inside Maya to envelope these extra layers in the simulated dress gave results that were too soft and didn't react enough to the simulation, or would jitter frantically. Consequently, Jonathan ended up taking a kit of parts from Maya and mapped a set of curves representing the ribbons from the base model to the simulated dress. He was then able to procedurally generate the ribbons along these animated curves. The system proved to be very robust and allowed automatic processing of the ribbons each time the simulation changed, or the input curves or ribbon sections were modified. Hair Style“The hair was also a complex challenge, as Jupiter's hair was styled in the shots before and after our zero gravity section, and the hair had to move in a very specific way inside the beam and regain gravity as she gets out of the bed,” Jonathan said. “After some early groom and simulation tests, it became obvious that the guide curves would have to be animated to hit very specific poses, leaving simulation for the secondary movement and lag generated by the beam. |
 |
|
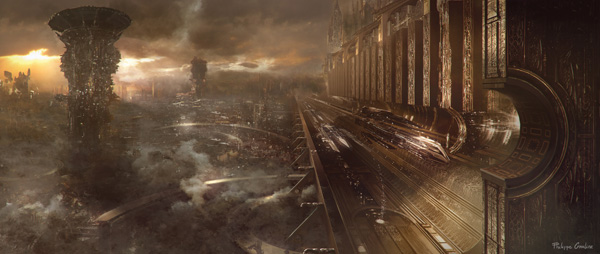
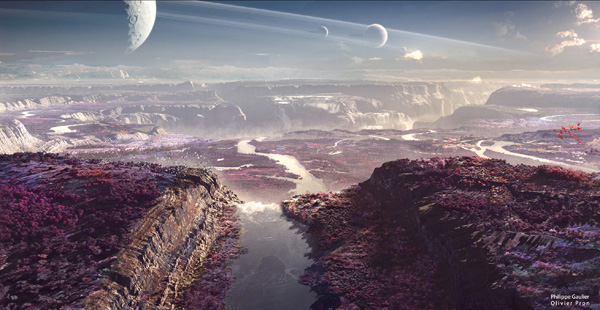
Pink PlantationKalique’s Alcazar was another alien environment the team created – an expansive, full CG landscape. “It is a huge environment. The castle, for example, was to be about 1,000m tall. To be able to build a world at that scale, and include enough detail, we took the same approach as the environment around Orous, combining projected matte paintings with some CG assets. This saved time and took advantage of our skilled matte painting team. “We could model a simple version of the landscape in Maya and, in the matte paintings, give it a natural, weathered appearance in World Builder scene building software. We then covered it with vegetation using Vue. This produced a good variety of plants for us, but coloured green, of course. Our planet, called Cerise, is meant to be pink but once we changed the colour scheme over to red, it looked so unnatural it was actually quite difficult to tell what we had. Therefore, look development went through two phases. The green phase told us the lighting and textures were correct and realistic. Then after transferring to red, we adjusted it slightly, even adding some blue and orange colours to break it up a little.” |
 |
|
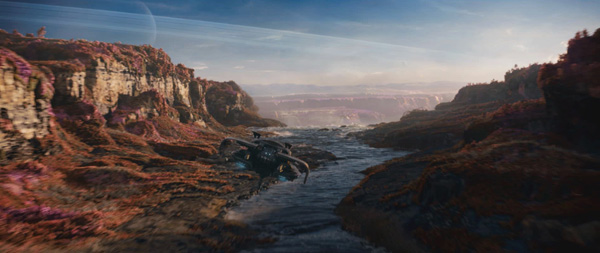
Water ProjectionsWater in and around the falls was handled in various ways, some of it reprojected. A crew went to Iceland to shoot suitable water reference images and clips. In the studio these were stabilized, separated into elements and reprojected onto cards to place into the landscape. Imagery of the falls, however, was at best 100ft high and had to be extended to 100m, again using a combination of the real water projections and CG elements including mist and haze. The Alcazar environment contains a key live action shot for several of the VFX vendors, including Method. We see the hero, Caine, dropping down from the massive space ship he rides with Jupiter, into the Alcazar basin. The actor was shot on green screen in a rig on wires. The underside of the ship was created at Method in Los Angeles. Framestore in Canada transitioned the actor to a digital double, which they animated, rendered and shared with Method, where they blended this render into their waterfall shots and combined it with their cameras. Simon noted, “When assets need to be shared, it’s sometimes more efficient to share the renders if possible, because these are frequently updated and easier to manage at the receiving end. |
 |
|
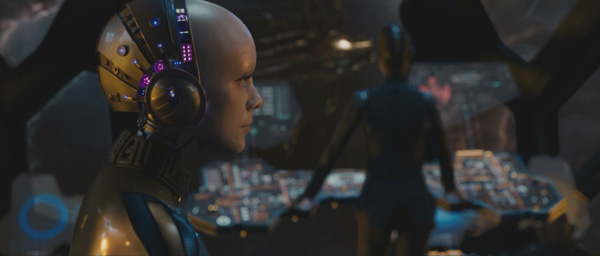
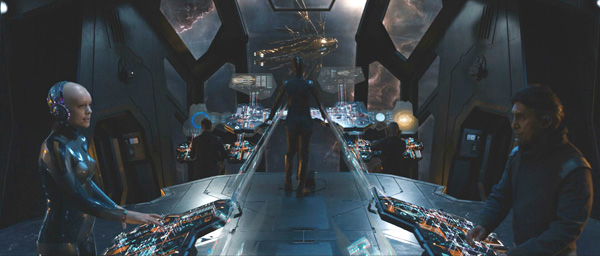
Interactive GraphicsDuring the film, the cast interacts with a number of animated graphics that play live onto screens on-set, a great deal of it created by the production art department. We were given this material to enhance, but also concepted some additional graphics for specific set-pieces with our concept department. A large range of options, mood boards and ideas was generated between artist Philippe Gaulier in concept and VFX supervisor Stéphane Nazé, and was used to arrive at the final looks. In the case of the voice-and-hologram tablets called sheaves, used in Orous to validate Jupiter's inheritance, this also followed a process of design and concept before animation began. “On set, the desks that the actors are operating were in place, often with perspex screens carrying projected graphics. This gave light interactions and helped with eyelines and the precision of their performance. In post, a Lidar scan of the ship’s command deck was used to line up all of the track cameras and then a full CG version of the control desks and their floating screens was created with more holographic and lit elements as well as moving parts and buttons. |
 |
|
The team had HDRI photography from set, helping them match the lighting environment in their CG set as they worked. While the effect of the lighting from the CG elements didn’t have much impact on the environment, as the artists enhanced and replaced many of the graphic elements on the bridge, they could generate interactive light passes and reflections as required. They often used proxy objects for this interaction and integration, without replacing the shot elements with the CG. www.methodstudios.com Words: Adriene Hurst |


