|
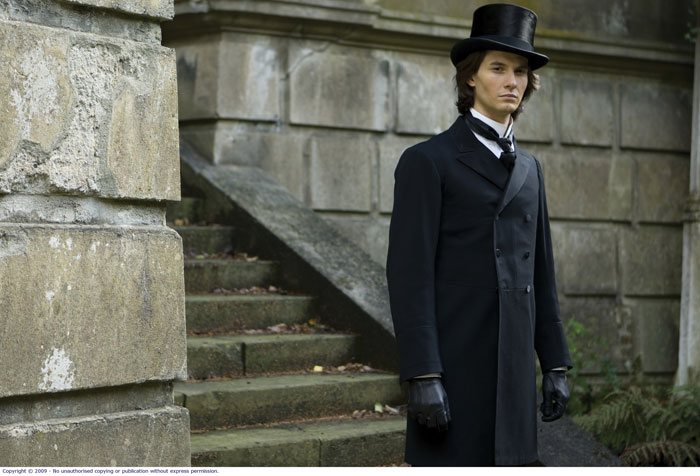
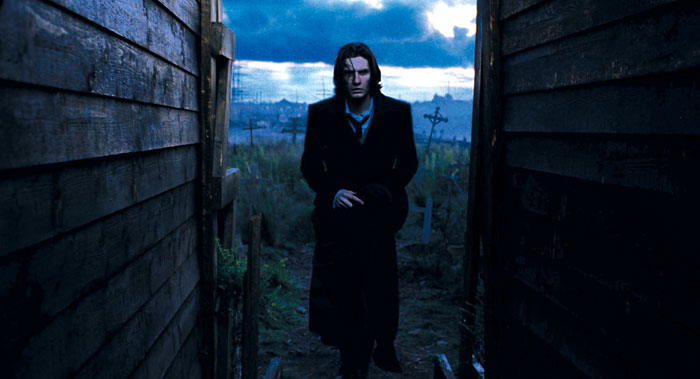
MPC’s team led by VFX Supervisor Charley Henley completed over 70 shots for the film including set extensions and CG environments, as well as covering on set supervision for all the visual effects shots on location around London and at Ealing Studios. Working with Production Designer John Beard, MPC built the dim industrial cityscapes referencing period pictures. CG buildings and streets were created and digital matte paintings were used to extend sets. A CG roof had to be added to Dorian Gray’s house to accommodate the mysterious attic, a critical element of the story. Several 3D dirt textures were developed to make the house look run down, brooding and sinister.
During pre production, Charley’s priority was to gain a clear understanding of Director Oliver Parker and John Beard's vision of the shots to be able to give constructive creative input and work on how VFX could help sell the look and story.
On-set Supervision
While on set, he had two conflicting responsibilities. One was to look for opportunities where VFX could enhance a scene. This often occurred on location where there were more unknowns and variables such as the weather. “A number of times for this film we realised that just changing the sky in post could really enhance the atmosphere or digitally dirtying up a building that was inaccessible on location, or adding rats to a street scene. This was really the fun part.
“The other responsibility was to see how and where we could work most effectively to stay within the budget constraints. We had pre-planned the number of shots that was affordable so, as the shooting commenced, we found we had to shuffle the shots in one scene and take away from others. Complex shots had to be well planned with animated pre visualisation that we worked on during the shoot.”
MPC's Match mover Jonathan Miller looked after on-set data capture. Camera data and set measurements were taken, along with data from tracking markers strategically placed in camera to aid computer matching the camera moves. Reference balls, grey and mirror, were filmed and high dynamic range 360° images taken of each lighting setup to be used later to simulate the lighting conditions of the filmed scene.
Environmental Pipeline
Describing the software pipeline used for environments, Charley noted that one of the more complex environments was the surrounding of Dorian's house. He said, “The first task was to import the collected information we would need to make our virtual set match the filmed plate, and then gather some buildings from our model library into Maya to create a layout of the city.
“With these basic 3D environments rendered in a neutral gray, we worked out with the Director and Production Designer how to fine tune the look of the scene. Once the layout was approved, the lighting and look development department started working on lights and materials with a set of custom MPC tools in order to match the shooting conditions of the real set.”
Meanwhile, the digital matte painting artist Yanick Bourgie painted a very detailed concept for the London skyline, which was used as a base for the final digital matte painting. “At this stage, we had a rough version of the 3D and enough elements to start compositing the shot,” said Charley. “After a fine balancing of the 3D layers rendered with Pixar Renderman, our environment artist Marco Genovesi set up an array of camera projections to allow him to digitally paint into the 3D scene over the rendered city, adding little details and a touch of magic to the early morning lit environment.
This new render was layered over the original 3D render and blended with animated specular highlights, atmospheric and lens effects by Laurence Lok using Apple Shake and The Foundry Nuke.
To approach films like ‘Dorian Gray’ that require extensive set extensions and green screen replacements, MPC has developed ways of making many shots in the same scene more efficient. “We have a layout department who set up a whole environment or scene, placing buildings, boats, props and blocking of animated characters. Texture maps are linked to these models. Then, each shot’s specific camera is dropped into this scene and packaged up to work very efficiently with the lighting department.” On the other hand, he said that some shots require simpler matt painting on projection techniques and this can be much more shot specific.
Decaying Portrait
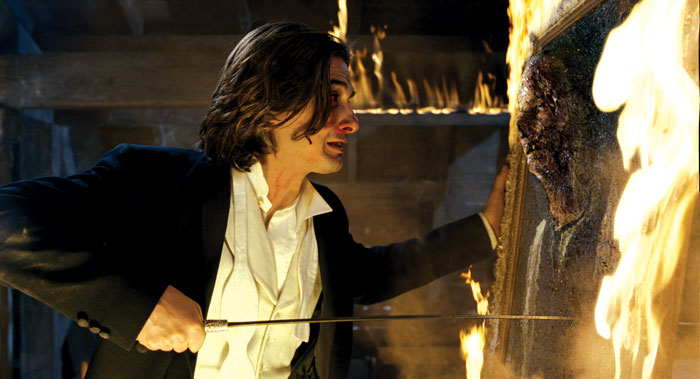
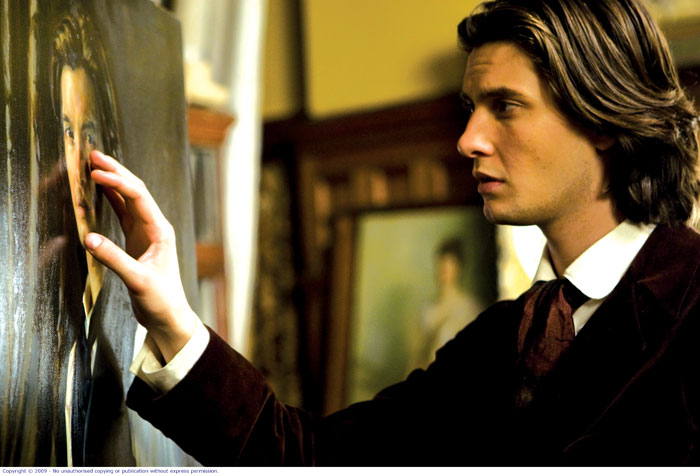
The biggest challenge in the film was transforming the decaying picture of Dorian Gray into a living being. An original portrait was painted by Paul Benny, who worked alongside MPC’s concept artists to develop the look and texture that would work well as the portrait evolved. CG maggots were blended with pictures of the painting and a 3D oil painting texture.
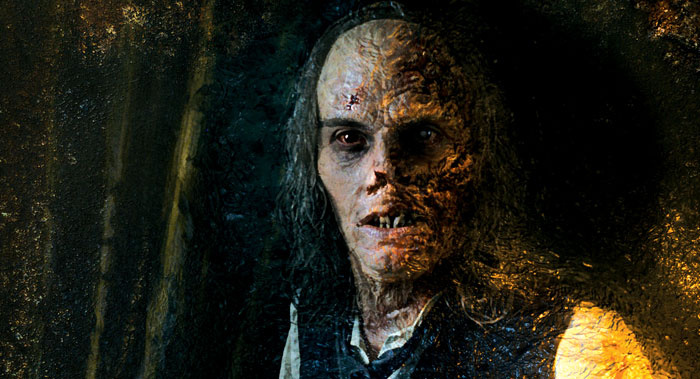
For the final state of decay, the director wanted the painting to literally come alive. To achieve this, a three camera set-up was used to capture Ben Barnes's performance and practical make-up textures. 3D scanners were used to collect digital data of the exact dimensions of the sets as well as Ben Barnes himself with prosthetic make-up of his final state for quick, accurate computer modelling. The live action was enhanced with CG holes and eaten flesh. The team also carried out various green screen replacements of the picture in several scenes.
“We hadn't done anything like this before. It was a new challenge,” Charley explained. “So we approached it from a number of angles, keeping an open mind about the methods as long as possible.”
Breakdown: Elements and Light
“First we broke the image down to its key elements - animation, surface texture, surface animation, transition and the form. We wanted the paint itself to have a thick and tangible quality, and the original painting's artist Paul Benny worked with us to come up with natural paint looks that were a realistic departure from the original art.”
They broke up all the lighting elements, too, and each light was rendered separately. The three cameras gave coverage for moving shots, used for accurate tracking and 3D rotoing as well as texture projection. “Moving frames of Ben Barnes and the original painting were camera projected onto the geometry we created for the erupting painting. These projections were rendered and baked into the new painting animations. Henry Badgett, the lead compositor, then combined all these elements with the help of some proprietary compositing projection tools using Shake.”
In the frightening climactic scene when Dorian stretches through the canvas transitioning from 2D picture to 3D image, the main problem was balancing the lighting from the picture with that of the room while retaining the picture’s original colours and textures and blending this with the live action room. Lead lighting artist Jensen Toms needed to experiment with the surface lighting. “We had to depart from the usual ‘match the set’ lighting rule and work with light that gave distinct shadows to visualise the 3D form of the moving surface,” said Charley. “Then in Shake, Henry very carefully balanced the 3D set lighting, fire light and the values of the painting itself. Flames and smoke were composited from a separate live action practical shoot we did.”
Blood on the Tracks
MPC also worked on a dramatic, violent sequence that takes place in a tube station, right down inside the tunnel on the track, in which a man is run over and killed as Dorian looks on. The scene required digital extensions to the platform and tunnels and interactive lighting for a CG train.
Fortunately, for the platform and tunnels, they had a lot of very good reference pictures of the set, and used them as a base to achieve a perfect match between the real part and the extension. “We used Photoshop to remove lens and perspective distortion, and to neutralise the light in order to create 8K hi-res multichannel textures, which were needed to shade the set extension properly,” said Charley.
At the beginning of the project, because the length and the curvature of the tunnel were not well defined they decided to create UV textured modules that could be seamlessly assembled and deformed according to the director’s vision.
“Once the director approved the shape of the tunnel, we used camera projection to add some posters, stains of mould and additional dirt. Then we created a light pass for this environment, rendering different light contributions, IDs, occlusion and 3D depth on different layers to keep the workflow as flexible as possible, giving the compositors the ability to quickly change the visual quality of the image and easily add little details like animated flickering lights, or the characteristic bluish dust you can see in the air of underground tunnels.
“The train itself was done using a 3D model of a carriage augmented to look like a period tube train and basic lighting. A stylistic motion blur was achieved in composited along with some heavy grading using Shake. Johnny Harris who played Vane [the train victim] did his own stunts to perform the train hit. We had him rigged to a wire that pulled him out of frame on cue with set lighting changes for interactive lighting. In post, the wire was removed and some re-timing and lighting enhancement helped the shot.”
Ageing Technique
The director was also keen to add eaten-away, diseased flesh to Dorian’s face once he begins to decay himself. Practical make-up only went so far. “You obviously couldn't actually cut holes into the face of Ben Barnes!” said Charley. “Taking a frame from a key shot, we painted high res concepts for the look of the ‘baddest’ bad Dorian. When these where approved we match modelled the prosthetic head based off 3D laser scans, modelled in holes and a more severely nasty, bone-shrunken look based on concept drawings which were then adjusted to work as projection textures.
“We had a 3D version that matched the prosthetic plus our very extreme-looking version. These two models were then combined using blend shapes in Maya, giving us a version to animate of Dorian ageing.” Through all these shots, the general methodology was to use digital matte painted textures projected onto simple geometry or animated in 2D for most of the work, adding very simple lighting and specular passes where needed but overall, keeping the overhead of a full 3D approach to a minimum.
|
