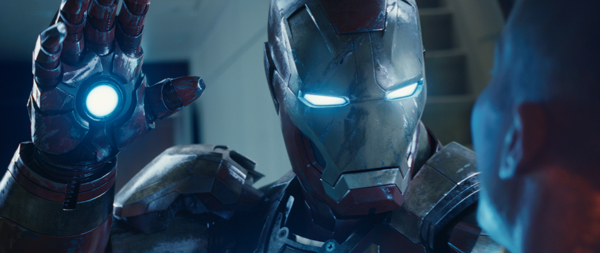
Framestore and Trixter talk about work on ‘Iron Man 3’, perfecting the new Mark 42 suit and getting the heat pumping behind Extremis.
Part 1 seepart 2
IRON MAN 3: MAN MACHINE |
| Trixter had very early design involvement with Iron Man’s latest suit, the Mark 42 debuting in ‘Iron Man 3’. Its new look, materials and uncanny abilities to respond and function by intuitively following the thoughts of its owner/inventor Tony Stark – all were just emerging from development when Marvel contacted Trixter in March 2012. |
 |
|
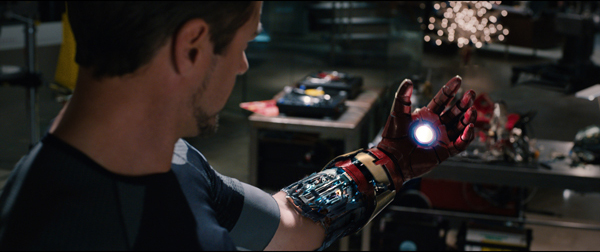
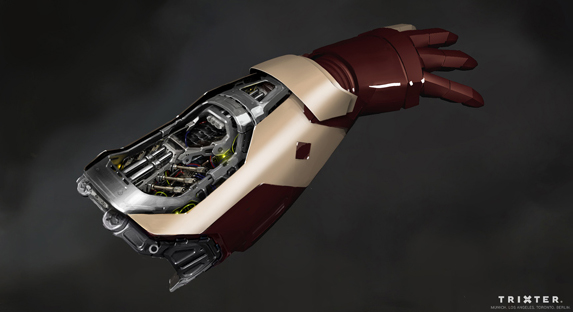
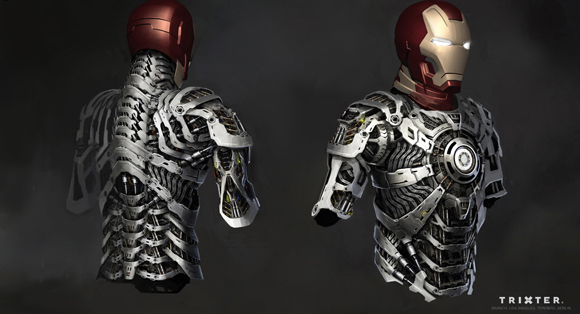
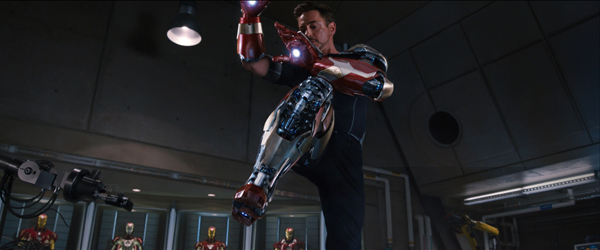
The studio already had the body-to-suit ‘connecting’ sequence in mind as an informal concept but at that early stage still needed to establish exactly how it would work and play out. It also was to feature in the Comicon Preview scheduled for July 2012, although principle photography was yet to start. Furthermore, because the design for the full model of the Mark 42 suit was just coming through the approval process at Marvel, Trixter had no actual asset to work from. Genuine ComplexityTrixter’s brief began with the development of concepts and designs for individual components of an Iron Man suit, which would then self-assemble and ‘connect’ onto character Tony Stark’s body. This set of components was not intended to precisely match the finished suit – that is, each limb, glove, boot, shoulder or chest panel should look somewhat dissimilar, as if they had been sitting on the laboratory tables, still in development. The team also had to devise designs for the complex undersuit technology that builds up and functions with the components. The team worked specifically on these assets with Production VFX Supervisor Chris Townsend, who wanted to retain the mechanical integrity of the previous ‘Iron Man’ movies. |
 |
|
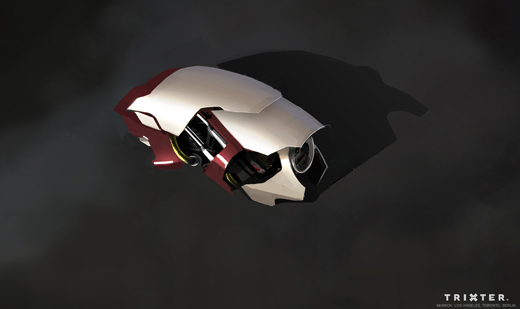
“He was looking for genuine complexity in the design, not just in the mechanical parts but also in the visual complexity through use of different materials, micro elements and tiny details,” said Trixter’s VFX Supervisor Alessandro Cioffi. “This was a quality Chris tried to encourage across the film from all the vendors. We had also done some full-suit animation for ‘Iron Man 2’ but he wanted all looks to match the first and second films, plus ‘The Avengers’.” Meanwhile, once Marvel had approved the new design, Trixter was also assigned tasks involving the full suit’s outer shell. The team received an .obj model from Scanline of the suit exterior, as a surface only. The team’s job was to divide this into several different parts, separating limb from limb, the gloves from the arms, and so on. This resulted in 24 main parts and numerous sub-assets which then had to be disguised within Trixter’s new design and build. Race Against TimeThen they had to recreate the animation necessary to re-shape these elements into working body parts. The final step was the animation allowing the parts to transform while flying to Tony and literally connecting with and onto his body. By this stage however, late May to early June, the project became a race against time. The period from design approval up to finishing and delivering the 26-shot Comicon sequence was only six or seven weeks. |
 |
|
They knew they could do it – the sticking point was the level of detail needed within the time remaining - not just a complex design but complex animation. This animation also had to recall the previous Iron Man iteration while bringing it to a new level and making it look slicker, as if Stark Industries’ suit systems had moved on from earlier generations. Alessandro said, “This demanded a lot of commitment from our team. We had to work in an unusual way. Normally, we set up a linear flow of work from department to department as the project progresses, so that models move to rigging and animation, lighting and compositing. But in this case, there was no time for that kind of flow. “Instead, as we modelled and re-shaped, we continued updating the rig. In parallel, we created materials shaders. Lighting and compositing usually did come at the end, but most processes proceeded alongside the others. More than once, we needed to finalise the compositing while asset building was still in progress. Throughout, we were also acting on Chris’ feedback via Cinesync.” |
 |
|
 |
|
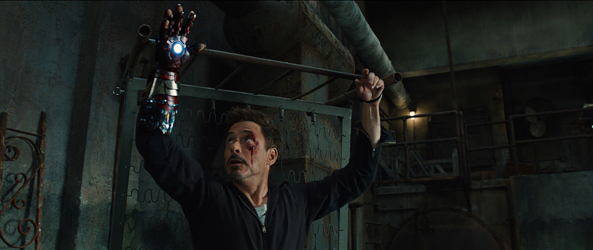
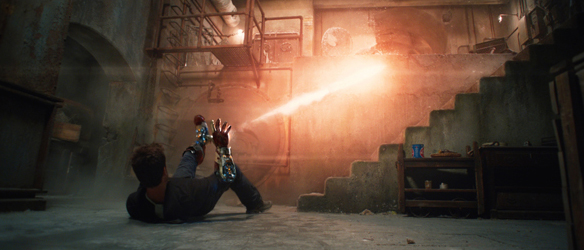
When the plates eventually arrived, they could reference their prepared animation to the match move and work quite fast. Furthermore, they could use this prep work on both sequences that feature ‘connecting’ performances – the earlier one in Tony’s laboratory and the second in the Mandarin’s hideout. Even when they finally had the plates, the cleanup of many rigs and tracking markers caused further delays. The actor hadn’t been keen to work with heavy match move equipment, preferring dozens of tiny markers. On the other hand, doing it his way did allow for a more humorous performance – the Mark 42 armour hadn’t been quite perfected yet in the first scene! Radical Materials“Having previous ‘Iron Man’ experience was helpful in some respects,” said Alessandro, “but since each film reveals a new suit it was technically a matter of starting from scratch. Full, dedicated rigging was required for the new model, of course, and the joints behave very differently to those in the previous film. The Mark 42 shoulders have a new design. In Iron Man 2 the shoulder is almost spherical and was much easier to rig, while the new rigid, articulated design needed a new approach. |
 |
|
“We also had radically different materials that needed special handling. Back in preproduction, once the new suit design was finalised, Legacy in Los Angeles proceeded to build the physical asset for the upper part of the body, and so they were responsible for defining the materials. Once they had built their model, they sent samples of the materials to the effects vendors to photograph, take reference and use for turntables. At that point we could also fully develop our shaders. Because of the hectic timing, our Comicon shaders had only been temporary.” Animating, rendering and compositing the separated assets used in the connecting sequences had been quite different to working with the model used in the full character animation. Due to their internal detail especially, the components were much heavier with surfaces, meshes, small elements, rigs and sub rigs, whereas the full suit was a ‘light’ version built to be easier to animate. IntegrationSimilar to the way the animators prepared for their work, Trixter’s compositors started integrating elements for the final look into the plates. The team continuously turned out final renders while working on the lighting because they knew the integration for the many elements - atmospherics, smoke, trails for effects, lens flares - was going to need a lot of time. They were using environment based lighting for rendering, but it still needed refinement. “To gain development time, we preferred to try to anticipate the final composite to avoid leaving absolutely everything to the end. We couldn’t prevent last minute story, animation or production changes but we find that really effective integrations and shot-to-shot continuity just take time to refine. So we started early.” |
 |
|
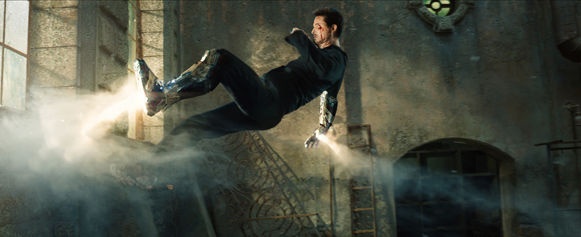
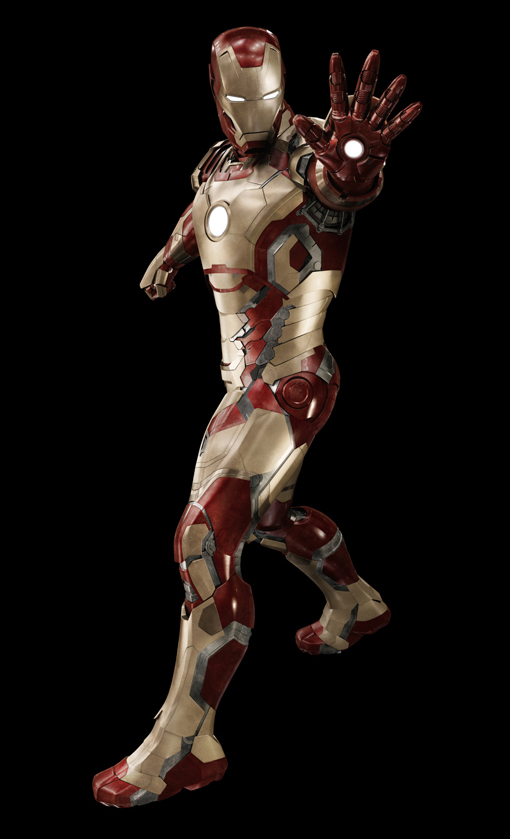
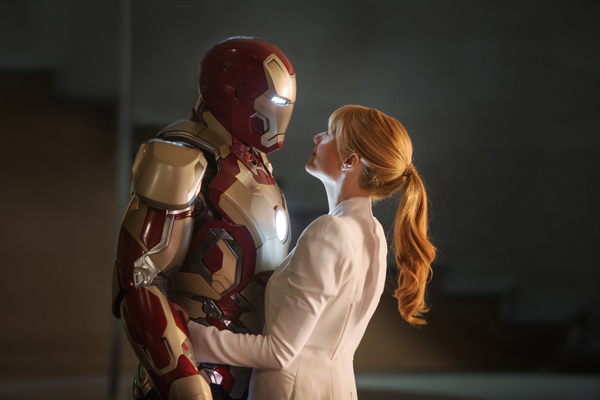
In an especially challenging, virtually all-CG shot, Tony Stark is captured and makes an heroic somersault as he fights off his captors. Only a small portion of the stunt actor is seen in the final shot. His head and most limbs are digital, as is the complete environment which was recreated from LIDAR and HDRI data. The whole physical set had been shot in HDR tiles from six or eight points of view with a Canon 5D covering the full 360°. The LIDAR data was divided into very detailed geometry and then simplified for reprojecting the tiles onto it. The stunt actor has been shot on green screen using a fairly static camera that simply moved around him. Trixter’s team re-built this as a 3D camera in order to introduce the moves in the previs camera. Later the stunt actor was almost entirely replaced, mainly because the director wanted to alter his performance somewhat. In all, this single composite involved nearly every department at Trixter, not just the animation, lighting and compositing teams. Home BodyTheir most fun sequence, however, did not involve fights, or heavy effects or flying components. Instead, it shows his girlfriend Pepper Pots’ first encounter with the new model hero, at home. As she enters the room and sits with the shining armour on the sofa, both she and the audience are unaware that Tony is not inside but down in his laboratory, working remotely. |
  |
|
“Again, because this sequence needed a full-suit character animation the work was quite different from animating the components,” explained Alessandro. “First, the focus was on a personal style of performance. We needed to suggest how Iron Man - suited up - behaves in his private sphere. We didn’t actually have any reference for this, and neither Pepper nor the audience have seen this Iron Man before. “The scene reveals a sunset, Iron Man at home by the fire sitting on the sofa with his girlfriend, and so his behaviour, his walk, talk and gestures are all-new, requiring several iterations. We tried versions from bold and heroic to casual but eventually aimed for Tony Stark’s own behaviour. The scene also demanded some subtle moves. He gives Pepper a massage, for example, with lots of CG/actor interaction and had to be gentle, not rough. Pure Animation“Further to this, when the Iron Man armour then needs to walk back down downstairs and we realise that Tony is not inside, the animation had to abruptly switch to that of a completely different character. He’s no longer a funny, affectionate person but straightforward, mute, robotic machinery. We were purely relying on animation style to show that change, not on changes in the rig or model.” |
 |
|
Both the connecting sequences and this full-suit animation help the audience understand the nature and functioning of the new technology. Consequently they become important story points demonstrating that first, the suits can disassemble and re-assemble when and where required and second, they can move and act separately from the controller. “We had some further, shorter opportunities to animate the Mark 42 suit as well, and that was really fun and exciting for us. While we have a lot of experience by now with CG animation/live action integrations and animation, having a chance to reveal a new level of performance for such a well-loved, well-known character definitely added to the challenge. “Working on the show as a whole project was very satisfying as a chance to fit in effectively with so many other vendors, as well as be part of a great movie for audiences. The overall coherency, due to a large part to Chris Townsend’s efforts to unify the work, motivate and encourage us has produced a solid look from beginning to end.www.trixter.de Framestore Heats UpIn October 2012, when principle photography was nearly complete, the team at Framestore delivered 113 shots for ‘Iron Man 3’ led by VFX Supervisor Mark Bakowski. While one of the team’s main sequence involved working on Iron Man himself, much of their work helped develop and set the look across the film for Extremis, one of the story’s primary effects. Shots in other sequences required a digital takeover of one of Iron Man’s enemies and a large, extended fire simulation interacting with a partly CG, part live action character. |
 |
|
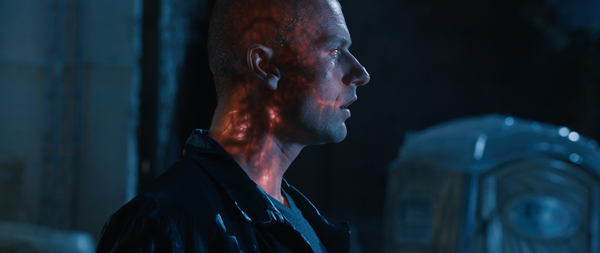
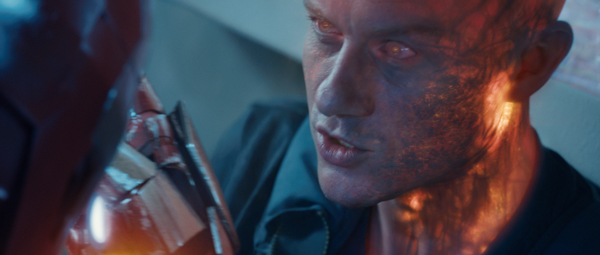
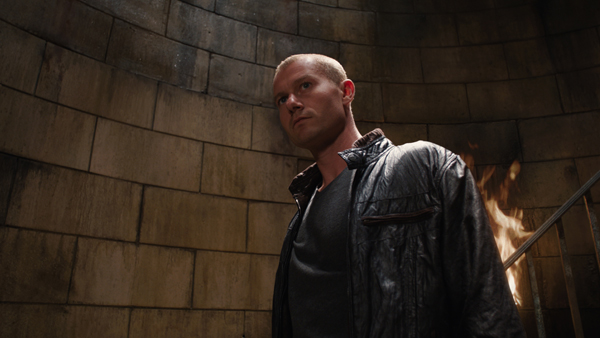
Extremis is a drug that gives people superhuman strength and the ability to rejuvenate. As it rushes through a person’s body it turns red hot, glowing and steaming as it flows through veins and arteries deep below the skin. It was important to visualise this in a believable, interesting way but also set up a pipeline so that the look of the effect would be consistent in all of the affected characters. A large part of Framestore’s work involved perfecting the Extremis look for the skull. Other facilities had already worked on the effect on limbs, but because it also involves the head and face, the skull required extra look development. Arms, for example, have structure and variation that the artists could use to show what was happening inside, such as silhouetting and letting the light wrap around the bones. But since the skull is more densely packed they had to thin out the interior to help ‘sell’ the interior glow. Stripping back from an anatomically realistic skull, which risked resembling a light bulb if they had just illuminated it, the team took an art directed approach. They followed the main brief to make the Extremis look as if it had volume, as if the viewer could see deep into the body, not just an effect on the surface. Anatomical ModellingTo gain enough control, the whole anatomy of each character was modelled – from skeletons and muscles right down to blood vessels and a network of capillaries, resulting in correspondingly heavy rigs managed by setting up a pipeline that allowed them to deal with each element separately. Deforming the associated geometry was another major task, calling for a customised deformer to make sure everything would fit inside the skin. They also replaced live action skin when characters were damaged or burned, mixing CG skin and burn with the plate. |
 |
|
Further to the rigging and modelling, tracking was a major focus because body and facial tracking was needed in every shot. CG Supervisor Alexis Wajsbrot explained that his team of trackers started with camera track, body track and facial deformation using 3D equalizer. Their small group managed to track over a hundred shots within the very short timeframe they had. Most shots had tracking markers on the actors’ skin and some had witness cameras, but beyond this they relied on the skill of the body trackers and finalling teams. Because lighting was central to revealing the depth Marvel wanted to see for Extremis, point clouds were used to drive lighting internally beneath the skin. The light effect was refractive – that is, the deeper under the skin the light went, the blurrier it looked. Lighting was set up in Maya for rendering in Arnold, and the point clouds that were used to control the Extremis were stored in the fCloud format. This format allowed them to generate the energy flows as particles in Houdini and read them into Maya and directly into the Arnold shaders at render time. Extreme ControlGetting this work and the tracking right meant the FX team could begin controlling the movement of Extremis by flowing particles along the veins and arteries. The flow was another carefully choreographed, art directed task requiring full control over the particles achieved with a set-up built in Houdini by Lead FX TD Selcuk Ergen and his team. The set-up contained animation controls the FX artists used to control the timings and profile of the particle flow though the arteries. They could also control which artery paths the flow took based on what was needed for the shot. The animation of the artery geometry was driven by the body track. |
|
|
|
The steam Extremis emits along with the heat glow was created with a fluid simulation in Maya. The process proved very time consuming, taking as much as two days per shot, and therefore the simulation had to be designed very carefully and robustly to run fast enough. As mentioned, the team had to address the challenge of reproducing the Extremis effect consistently on four different characters appearing in seven different sequences. Consequently the full capacity of the Framestore pipeline was turned over to setting up a small factory that the FX TDs and lighters used to update their shots if the model, the track or the look itself was changed. Regarding the Extremis flow, CG Supervisor Alexis Wajsbrot remarked that by the end of the show, updating looks could basically be done by pressing some buttons. Hot LookBecause so much work and so many different concepts had gone into refining the effect and making it visually appealing, it was very satisfying when their own version of Extremis did seem to be the one Marvel liked and sent out to the other teams. Stuart Penn said, “A lot of our look came from the way the lighting and utility passes were brought together by the compositing team, using Nuke. The utility passes gave plenty of flexibility for the compositors to refine the look without a lot of re-rendering.” |
 |
|
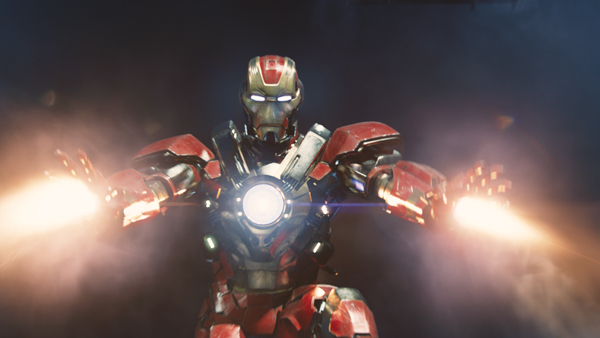
One of the movie’s main story points is the close link between the Iron Man suit, Tony Stark’s creation, and Tony’s own identity and personality. This point motivated the team quite a lot when it came time to work with the suit in some of their shots. The work the CG team recently finished for the upcoming film ‘Gravity’ actually helped them on this part of the project. They were handed the Iron Man asset from Digital Domain as a Maya scene containing the geometry and a collection of texture maps, provided with a reference turntable to match their work to. Within only about a week they had it looking as it should within their own pipeline, partly due to the development of their Arnold shaders for metals and hard surfaces created for ‘Gravity’, which saved them many of the usual difficulties encountered during look development. Iron FlexibilityStuart pointed out, “We have developed a core pipeline as a comprehensive toolset that is flexible enough to be shared by teams on other shows and still allow for different requirements. It’s very useful when we have to start a show quickly, as in the case of Iron Man.” Their primary 3D tool for modelling, rigging and animation was Maya extended with proprietary plugins. Further sculpting was done in ZBrush, and the texturing with Mari and Photoshop. "We’d got well into the Extremis work before we started on Iron Man,” said Stuart Penn. "There was a lot interactive lighting between the suit and the Extremis effect. At one point the enemy grabs him and heats up the suit – so we see heat glow and sparks as the suit is short-circuited.” This level of interaction was another reason why they needed the track of the arm, for example, to be very accurate. |
 |
|


