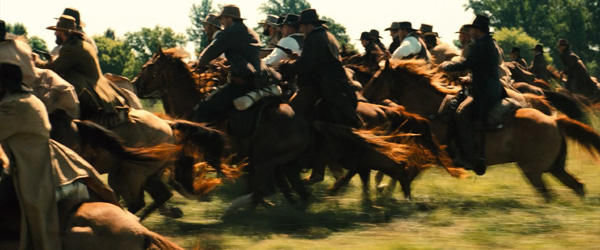
The story of the most recent version of ‘The Magnificent Seven’, directed by Antoine Fuqua, unfolds surrounded by the sweeping mountain landscapes of New Mexico, but the production took place in the humid wetland region around Baton Rouge in Louisiana. Teams from ZERO VFX in Boston and LA worked on 700 shots throughout the film, transforming the landscape and producing many other effects to support the narrative. ZERO worked as lead vendor on the project, the company’s largest to date.
Apart from the environmental work, ZERO worked with some interesting challenges. The director wanted to evoke the feeling of wide open country associated with the Wild West, and chose to shoot on film with anamorphic lenses. The movie also has two very well-known, contrasting precedents - ‘The Magnificent Seven’ of 1960 by John Sturges, shot in the Mexican desert, also anamorphically, and the original ‘Seven Samurai’ of 1954 by Akira Kurosawa, set in rural Japan.
The ZERO team pitched for the job even while the film’s script was still being finalized, keen to work again with the director after delivering similar VFX work for Antoine Fuqua’s ‘The Equalizer’ and ‘Southpaw’. During the initial stages, ZERO worked with him and production designer Derek Hill to establish the film’s cinematic style. Reference was made to both of the earlier films.
Slice of Paradise
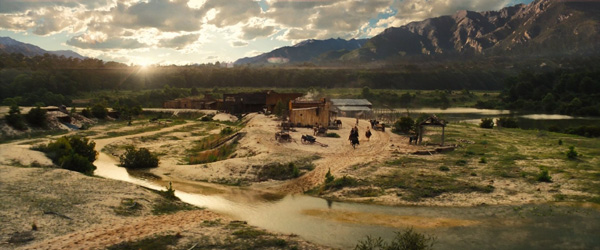
"’Seven Samurai’ was a huge source of inspiration in terms of tone," said ZERO VFX’s Creative Director and Co-founder Sean Devereaux, one of the project’s VFX supervisors. “The town in that film was beautiful and felt worth protecting, and that became a focal point of the early production work and planning for Rose Creek in this film. We wanted to design a location that viewers felt was worth fighting for – a little slice of paradise.”
The pre-production work ZERO carried out for ‘The Magnificent Seven’ was more extensive than on any film they had worked on previously. “We created lookdev, animation, stills, previs and tests for every aspect of the story," he said. “We even mapped out the battles, where each character would be and when, and went through hundreds of iterations of mountains, landscapes, skies, munitions, towns and buildings, working to establish the right look.”
Sean was involved from the beginning, back when they were deciding on set locations in Louisiana. Because the production erected an actual city there, preproduction took place quite a while before filming started. Sean took on the role of overall effects supervisor, while Sean Ryan Jennings served as the art director on set and then joined ZERO as their VFX art director. Between these two, the team back at the studio had a very clear picture of all the ins and outs of the activities on set, and what the director expected.
The Invisible Mountains
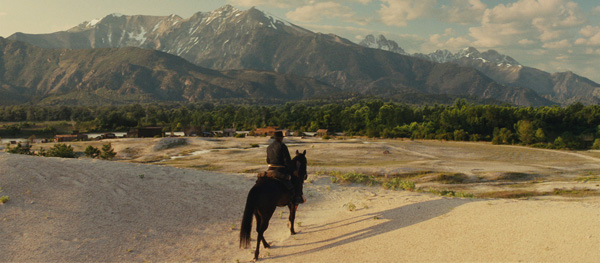
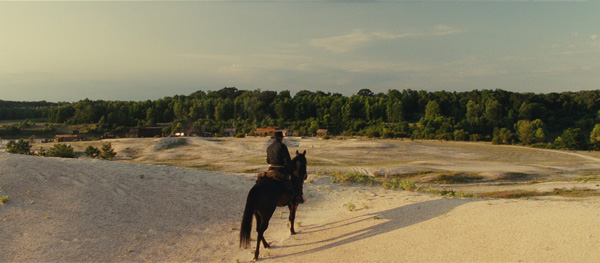
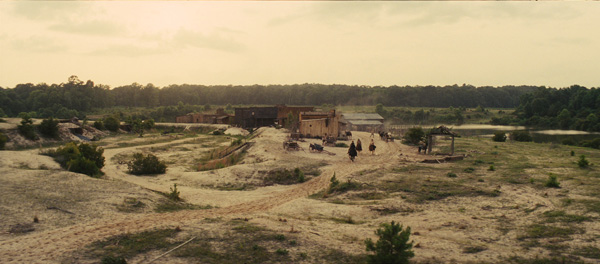
Dan Cayer, Sean’s co-VFX supervisor said, “Initially, the most visible look development for us to take on was the surrounding mountains. A big part of the concept was the idea that this town was built in the valley of a mountain range – however, there are no mountains in Louisiana. Almost every shot needed to show those mountains in some way. They had to be beautiful and photorealistic, but also not distract from the acting or give any clue that they were visual effects. It meant treading a fine line, because if you make something look extra beautiful and appealing in the lookdev phase, it can very quickly look hyper-real, larger than life.”
The contrast between the real landscape and the story’s setting made Sean’s presence on set especially important. Working together closely each day, combined with their past work experiences together, made it easier for Antoine to trust in the plans Sean laid out. Every single shot was framed without mountains, while knowing they needed to frame for mountains to be placed later on. ZERO’s concept art and previs also helped with this understanding, and made it clear what the team would be capable of executing, going forward.
The post team also appreciated Sean’s consultations with the DP Mauro Fiore about composition and approaches to camera moves. When some full CG pick-up shots were needed at the end of post production, they adopted his style of framing and lensing, and any dolly camera moves had to include the same imperfections, bumps and shakes that would go into a real camera move on set.
Seeking Santa Fe
Starting work on the backgrounds needed both specific and general research. Dan Cayer said, “We looked at lots of reference from the Santa Fe area, but our in-house matte painters built up their own references based on realistic types of mountain ranges and geography that could believably exist in a scene from the American Southwest in that time period.
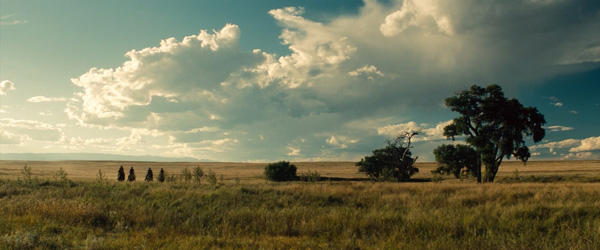
“We went with a 2.5D approach for these mountains. Our camera never had to fly through them, so the shots didn’t have to be full 3D - they were always a background element, despite being very present. Nevertheless a 2D approach wasn’t going to work either, because we’d end up having to produce a lot of matte paintings, and we had a number of shots with dynamic cameras and heavy parallax.
“The mountains were initially designed within the context of 2D still-frames, but once we had the imagery for a few different angles and were fairly happy with the look, we put that into a 2.5D set. They were basically deformed cards - slightly more than flat cards, with curvature so that different camera angles would still be viable. We spaced those cards with the different mountains at different distances, all of which were accurate according to the dimensions on the ground.
“So, even though we are actually looking at a mountain that is placed on a curved card, that curved card is the correct number of units from the next curved card, which is the next mountain. This set-up produces an inherent parallax, which you will see from different cameras, different lenses and different camera moves, even though they are painted images. The artwork was designed in Photoshop, we used Maya to place the camera tracks and initial placement of our mountains, and Nuke was where we assembled and propagated the set, from shot to shot.”
Behind the Scenes
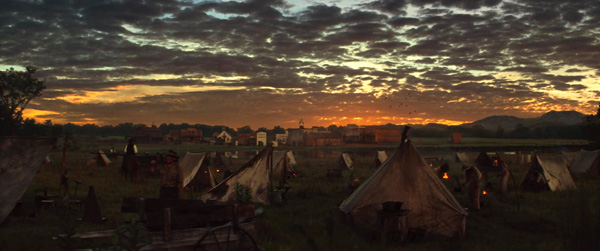
Once the team started receiving the plates back at the studio, they worked on them over the next four months. The first step was to create a camera track using SynthEyes and 3Dequalizer. Rotoscoping also played a huge role in placing the mountains behind the people and set. Because of its size, the Rose Creek didn’t lend itself to building giant green screens behind the action. Every object that was supposed to be in front of the mountains had to be rotoscoped with Silhouette.
The anamorphic lenses sometimes complicated such camera work as rack focuses, and could produce quite a bit of animated distortion. They could use SynthEyes for tracking initially but, when they encountered anamorphically challenging shots, switched to 3DEqualizer, which can export out animated lens distortion to be applied to footage.
Consistency in the effects was a primary concern. ZERO needed to make sure their beautiful digital mountains constantly occupied the same space in the background, and that their dimensions remained correct in every shot, from every angle. To do this, they built a detailed, highly accurate 3D digital version of Rose Creek, supported by LIDAR scans of every building on the set, high-resolution images and a set of physical blueprints.
Rose Creek Replica
Using this data, ZERO was able to correctly position the digital mountains and other background elements and avoid visual anomalies. "Without this preparatory process, guessing how to position these mountains would have been a nightmare," said Sean. “Placing a digital mountain this close to a set is one of the hardest things I've done in my career. It took a lot of iteration to find the right scale and placement, but that on-set preparation made the workflow in post much simpler.”
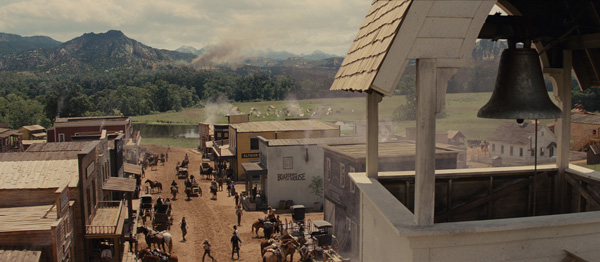
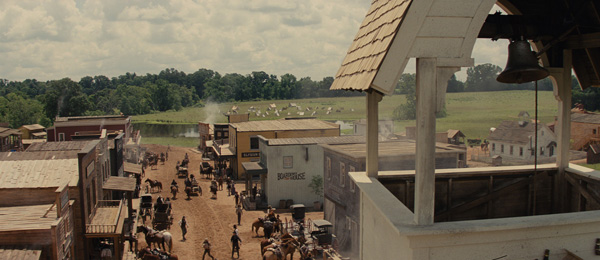
Antoine Fuqua also used this data to make decisions on shots after principal photography had wrapped. Dan said, “On set, the director had certain images in mind involving digital elemets he couldn’t see yet. After we started creating and delivering shots, Fuqua fell in love with certain vantage points and wanted to see more of them, or wished they had shots that were slightly different to what had been captured.
“Consequently, by the end of the movie, we recreated several almost completely CG scenes to make shots that didn’t exist. For instance, it was decided we needed another scene after we see the stars riding out of town. At that point in the schedule, I don’t think the physical set of the town, which had been a cow field before filming, even existed anymore, but we were able to recreate it for two shots, entirely in CG. For other shots we re-built major props that had been destroyed in the final shoot-out, to populate full digital backgrounds for characters shot on green screen.”
Beyond scale and positioning, digital props needed to tie in with practical set pieces used on location – from arrows to wounds and building damage, sometimes very close to camera and among the actors. “We spent time researching what the actual props were and what they actually looked like for as close a match as possible. A good example is the arrows. We had the props from the set sent to our modellers and texture artists who rendered them to to look exactly as the real arrows would have appeared. Such items are a huge part of making sure our work blends into the reality on set,” said Dan.
Skies Alight
In order to build out the spectacular skyscapes surrounding the background elements, ZERO shot more than a terabyte of reference footage as the basis for the slow sunsets and blazing blue skies, replicating those at Santa Fe.
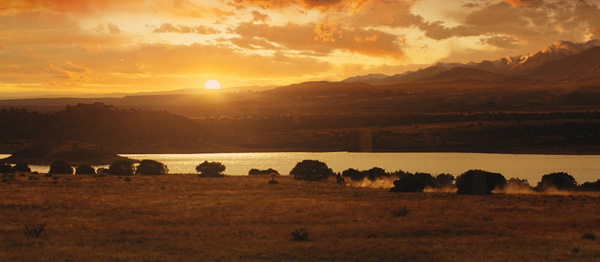
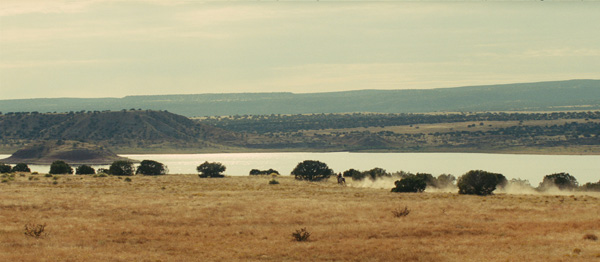
The direction of light was also important. Production assistants captured footage of the sunlight shining from every possible angle during production so that the VFX team wouldn’t have to guess how light would fall on the assets they created for the film – they could just reference this footage and realistically light everything from mountains in the distance to dust clouds billowing from digital explosions.
“On the whole, the goal was to avoid the work of re-lighting each shot,” Dan said. “When we replaced the mountains, we displaced a lot of other things as well - certain trees came out and clouds from the sky itself. We would try to make the lighting on the people work with what we had, but in some situations it needed extra pushing and pulling and re-lighting.”
Looking for a Fight
ZERO’s team also got their chance to turn from landscapes to address some scenes with more immediate impact – resulting in an action-packed showdown sequence in true Western style. They delivered a variety of full background replacements, digital explosions, whizzing bullets, muzzle flashes, flying arrows and bullet hits, and pushed these effects into the physical world by adding dust kick-up, splintering wood and other nuanced effects. As Sean said, "They’re subtle additions, but each one adds a sense of place and grittiness to the film."
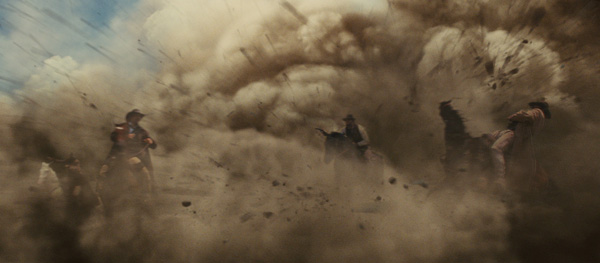
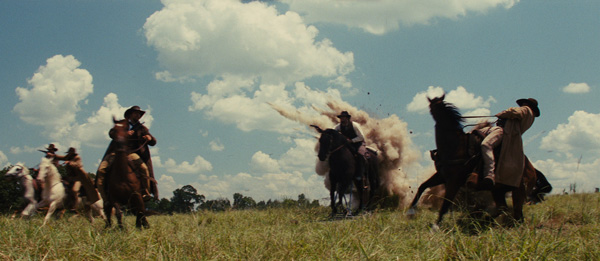
In post, each turn of the story and associated effects were assessed on their merits. “Because the destruction in the dynamite sequence, for example, where they dig trenches and bury the explosives, was going to produce explosions generating thick, shaded cumulous dust clouds with a sunlit and a shadow side, it was going to be very hard to use stock 2D elements,” Dan said. “In general, the bigger, the bolder - the more of a story-point the explosion is, the more likely it’s 3D.
“We needed to have to have a good, working explosions pipeline in place. For the 3D side of things we based it on 3ds Max and started lookdev very early in the process with reference photography from set of explosions of the dirt from the dynamite that we could also blend with the 3D effects. We worked with the director through scenarios of what might be the right look.
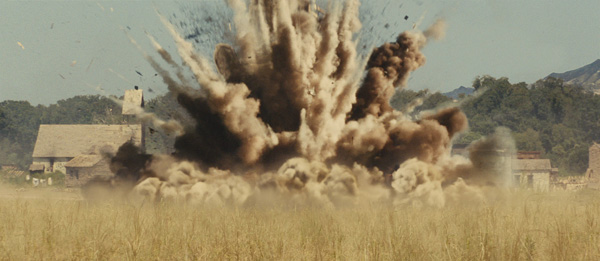
“We ended up with about 70 per cent of a typical close up explosion in 3D and 30 per cent actual on-set practical explosion, which we then married together. Often, just the smallest amount of actual footage mixed in puts it over the top and makes it all feel real. 2D elements – ones we had in the stock library, as well as ones shot on set as additional elements - were used constantly throughout.”
Explosive Machine
Again, Sean’s work during pre-production paid off later on in the studio. Dan said, “For some of the important moments, we were able to take a couple of shots through the pipeline early on and figure out exactly how we were going to achieve the sequence, visually and technically. That got us a long way. Any shot we started early in production, maybe for a temp screening, taught us a lot about what Fuqua wanted - how these effects needed to look, how much force they should have, the colour and texture. We could decide how they would work in our pipeline, simulation techniques, render times - we learned all of this.
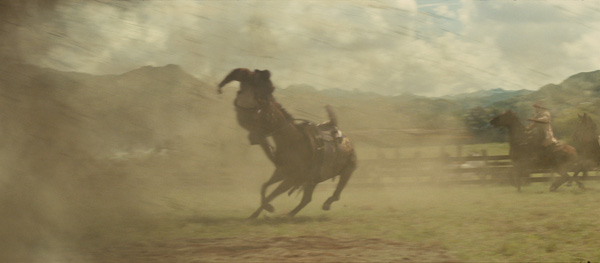
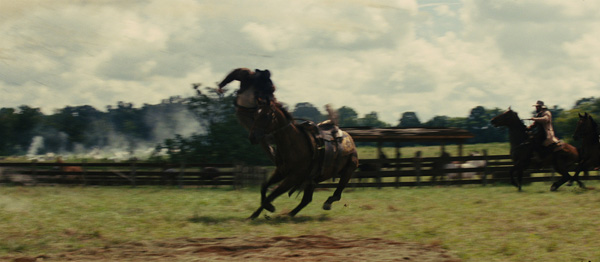
“By the end, we had the machine working where we could very successfully turn out these shots. We’d go back and redo them and from there, iteration went very quickly. We’d get them to that last bit of perfection that we eventually got all the shots to. Some shots go through the pipeline all the way to the end – we learn what we can, back up and redo them, and finally do all the others once we have the machine built.”
Building up the intensity of this sequence also demanded the trickier task of filling in scenes with scores of cowboys on horseback, again using a 2.5D approach. A number of additional cowboy and horse elements were shot on the set where they were needed. “Some were shot in clusters, others scattered out,” said Dan. “Our goal was filling in the frames to produce the feeling of a much larger presence, wherever the production hadn’t been able to gather enough people to make the battle feel as dangerous as it needs to be. Using plates, rotoscoping and duplication, and our element footage, we were able to make the crowds feel four, five, maybe six times thicker than they originally were.” www.zerovfx.com
Words: Adriene Hurst
Images: Sony Pictures Releasing


