
Nicolas Aithadi tells how the team at MPC created environments, a fiery ambush, digital assets and animated photoreal CG characters for ’47 Ronin’.
Japanese Western |
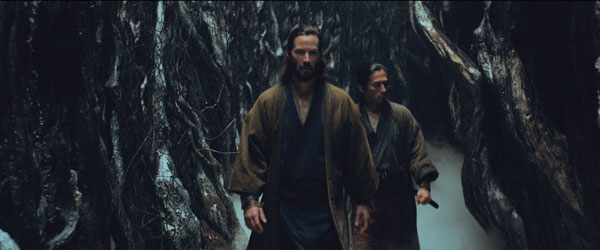
| VFX supervisor Nicolas Aithadi and his team at MPC became involved with ’47 Ronin’ in 2012, roughly one month before the shoot began, working with the director Carl Rinsch and overall VFX supervisor Christian Manz. They completed about 250 shots, varying across different types of environments, a night time sequence surrounded by fire, digital assets and animated CG creatures and characters appearing in shots ranging from distant crowds to extreme close ups. |
 |
|
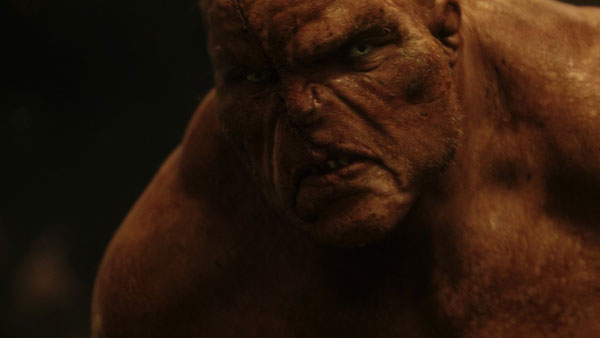
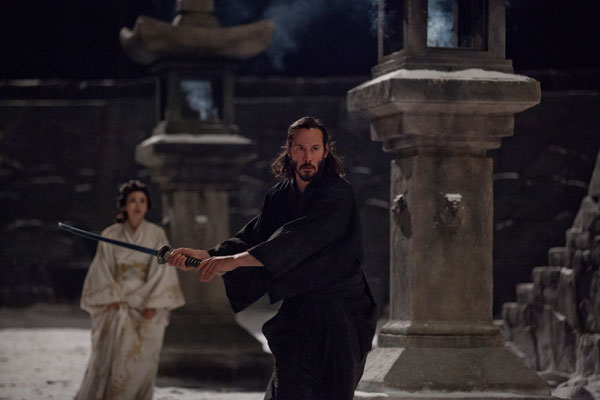
The story is based on a legend that has become a part of Japan’s identity, about 47 samurai whose master is killed by a warlord. The warlord banishes them from their homeland and takes control of the region and people. As the leaderless samurai, known as Ronin, seek vengeance, they have to battle against witchcraft and mythical creatures before they can restore honour to their people. Ready to FightA primary task for the team was a sequence in which the main character, named Kai, fights hand-to-hand with a character called the Oni, based on a demon from Japanese folklore. MPC took on the creation and animation of the Oni as a completely CG character, and then replacing a stunt actor captured in the plate with their animated model. A ZBrush sculpt had been prepared for the Oni but once the shoot got underway, and especially just after, a number of ideas emerged about how he should actually look. “The Oni started out in the artwork as a very different character to the final one seen in the film,” Nicolas Aithadi said. “He was initially much less human and more monster-like before evolving toward the idea of a prisoner - an abused individual, kept in a cage and only allowed out to fight in the arena on board the crowded Dutch Island flotilla before he was locked up again. |
 |
|
“Therefore, the director was looking for a combination of characteristics in the skin - but not a monster’s skin. He wanted us to use the skin of ordinary people as reference, including the model we hired for our shoot. Meanwhile the Oni of traditional Japanese folklore was always red, which is why we gave his skin a reddish cast, and his prisoner’s life meant he suffered from multiple wounds and scars. For this we sourced a collection of quite grim references from medical and skin disease imagery, which the lighters, led by Mathew Ovens, also found useful for their shader.” Muscular Precision‘47 Ronin’ was a good opportunity for MPC to refine and improve their creature creation and animation tools. The Oni ogre fighter demanded a high degree of precision in the muscles and skin, calling for a period of R&D which the team spent re-organising and building up their CG creature and character pipeline. Realism in the muscles was essential, but their existing set-up wasn’t taking them far enough in terms of control over the details that would bring him to life. “For example, most tools used to jiggle muscle and skin do not apply weight to their effects. They produce motion in reaction to the bones and performance, but the motion lacks a sense of gravity. Muscles are in fact quite heavy and hang from the limbs. So this sense of weight was a major focus for the rigging team during the project, led by the rigging lead Dan Zelks,” said Nicolas. “We wanted to develop a muscle system that would respond to gravity.” |
 |
|
Their work added further dimension to their proprietary muscle simulation system, CK Solver, in which CK stands for cyclical kinematic. The resulting system also allows muscles to interact with other parts of the body. If the belly of a big character is hanging down while the leg pushes up, the belly will be pushed out of the way and slide around the leg. As a volume preserving system, it combines muscle jiggle, deformation and an interactive mode. Four-Camera Reference ShootNevertheless, the further they developed the Oni’s looks and moves the more they realized they still needed to do. “It’s typical of working on characters,” said Nicolas. “We decided to hire a male model with a similar body type, not so young, and assembled a four-camera rig to shoot his body movements while he acted out the action according to the script. We could watch exactly what would happen to each muscle, the fat, skin and wrinkles during the performance.” This process made for a fairly strange viewing experience, but it did help them identify what was missing from their CG character. Their original simulation was missing out the small, characteristic muscle twitches that could be seen on their live model. They started by trying to add these procedurally, that is, triggering them by movement, but found they still needed to be hand modelled and keyframe animated to look right. Animation supervisor Julio Del Rio Fernandez and the animation team took over this task. |
 |
|
Their technical animators focussed on specific frames in the performance, in which they resculpted the muscles and wrinkles on his body as blend-shapes that were triggered through the rig. “In short, we went from a procedural approach to a hand-crafted, animatronic process – a good mix of a technical approach with artistry,” Nicolas said. “Even if we can’t guarantee we can now recreate 100 per cent of a performance, we took the simulation as far as possible in the time we had.” Evolving OniA team of about 25 artists worked on R&D for the Oni for about six months, not only on the muscles, skin and rigging but also the hairs over his entire body. Although he was bald, the face, arms, shoulders and scalp were covered in tiny hairs. They worked on the look for this hair, and also got it working correctly with the muscle simulation. Another factor that needed to interact well with the muscles was the cloth simulation for the Oni’s clothing, which needed a fuzzy look – instead of creating shaders for it they introduced a ‘fuzz’ layer. When the plates were shot a stunt double played the Oni’s part, an ogre-sized actor about 7 feet tall, for Kai to interact with on set. Interestingly, the director wanted to change the psychology and fighting style of the Oni after the shoot. While the actor had portrayed him as an aggressive, accomplished fighter, once he was altered later on to the victimised prisoner, his performance as well as his physique had to reflect the change when the CG character was introduced into the plate. |
 |
 |
|
“So, the opportunities that the well-designed and built CG character afforded to the production were valuable,” said Nicolas. “Of course because of all these changes, which included animation, we completely removed the actor from the plates, and that meant a lot of hard rotoscoping and plate preparation. The actor really was big, and there were a lot of spectators surrounding the fighters who we had to re-create as moving people, mainly by extracting people from different shots to replace those that had been painted out. But eventually we achieved the full sequence with Kai performing alone.” While the team were adding and keyframing the digital Oni, the only moments they preserved of the live action were when he was in full contact with either Kai or the set, so that they could assure the CG figure would adopt the exact same position. Legendary LandscapeCarl Rinsch’s overall vision of ’47 Ronin’ was of a Japanese western, and like any good western, the story incorporates rain, mud and fire, and at times the atmosphere turns foggy and moody. To introduce the necessary dimension of fantasy, he also a special vision for the environments surrounding the sets built for the shoots, taking place both at Shepperton Studios near London and in Budapest. |
 |
|
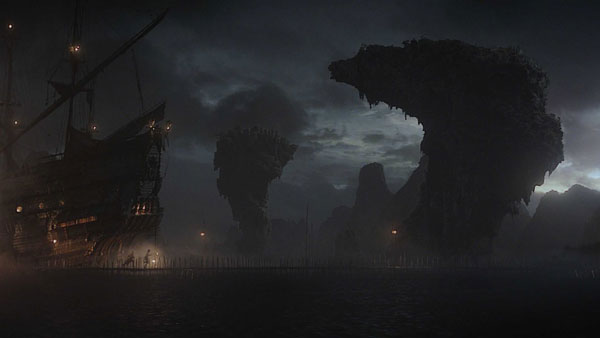
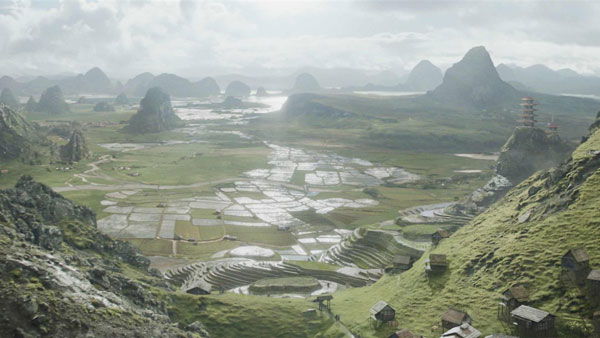
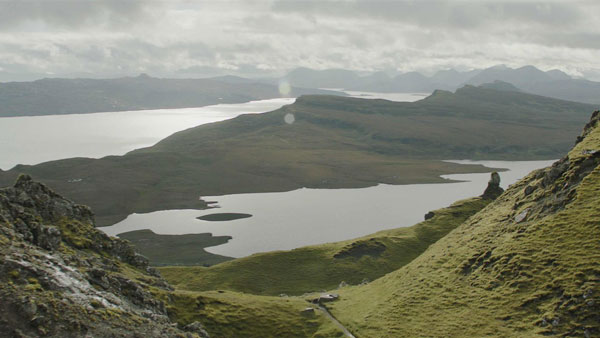
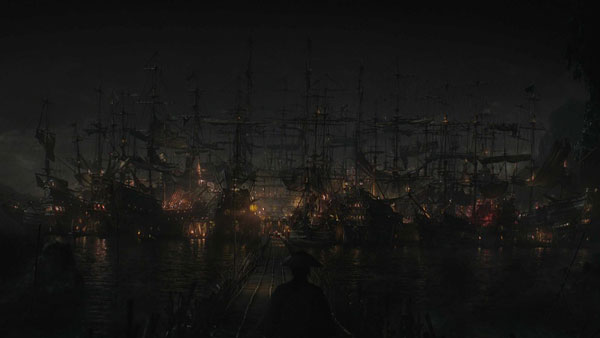
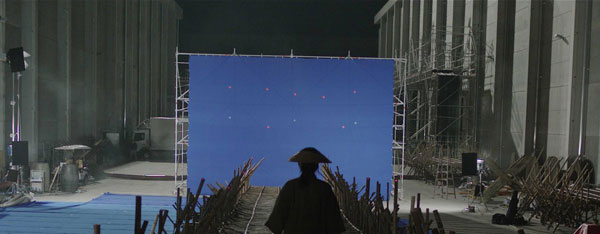
Nicolas said, “Carl wanted to use the environment to introduce the necessary dimension of fantasy into the project. He had a specific look in mind for the countryside. He wasn’t looking for an existing Japanese environment, but an idealised, legendary Japan associated with this famous story in people’s imaginations. Therefore the references were far-flung – from Scotland as well as Thailand and Vietnam for the exotic rocky land formations.” The fight sequence with the Oni takes place on the story’s Dutch Island flotilla, a collection of wooden boats densely bound together to serve as a makeshift island. The live action was shot on a blue screen set in Budapest where a section of a bridge and half a dozen partial boats had been built. The complete set was LIDAR scanned. From among the different partial boats, they could produce enough geometry to put together complete boats digitally and fill in any blanks with reference photogeraphy, until they had populated the ‘island’ with 21 boats in all. Floating VillageOnce the boats were positioned into a workable layout, the environment team’s artists could go back and add variations, details and textures to avoid repetition. Masts and sails, which had been missing from the set, had to be created also. Because these boats were not actually used for transport, the sails served more as canopies and roofs, and the whole conglomeration was handled like a village. Men and women were added everywhere - on the bridges, boats and walkways - created as animated elements to make the scene come alive and show something was happening. Small lights and smoke and dust elements were added as well. |
 |
 |
|
Nicolas said, “We shot some extras for the scene, although doing that brought associated complications because they could never be shot in the same lighting – they had to be extracted and prepared for the composite. So we made decisions about whether to place CG or 2D people shot by shot. On that first, wide shot at Dutch Island, all of the people are digital because doing so gave us more control. Digital people exist in 3D space and therefore don’t have to be scaled down – you can place them in a 3D environment and they maintain their inherent size and perspective. “Furthermore, we generally use our own crowd system now, which makes it relatively easy to introduce CG people. When the camera moves in among the boats and crowds are closer to camera we used the live action 2D elements create the activity on the island. As the heroes make their escape over the bridge, for example, we had some live action elements of soldiers shooting muskets.” The entire flotilla was built to be placed into the surrounding environment, which was essentially digital. Thus in the final composite, they had the live action blue screen plate of the character Oishi walking across the section of bridge toward the island, a digital extension of the bridge, the completed flotilla - plus all of the surrounding CG water, and the mountain landscape which was created by combining CG with 2.5D projected matte paintings to allow depth of field and hazing in the distance. |
 |
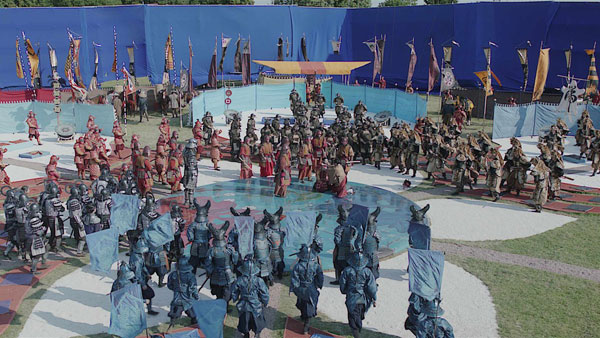 |
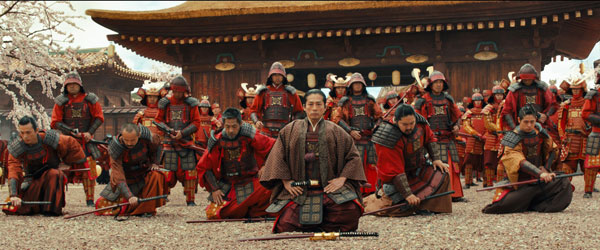
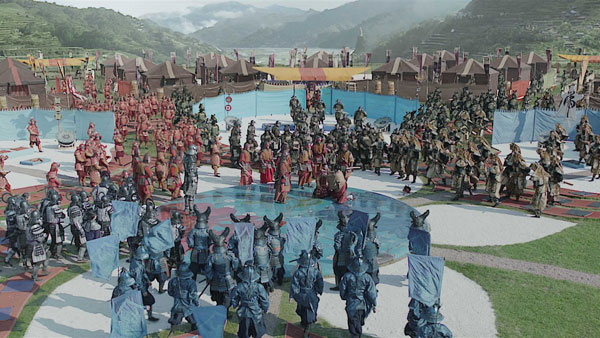
Building the SamuraiThe samurai tournament, pivotal to Kai’s commitment to the outcast Ronin, was shot at Shepperton according to a precisely laid out plan of action involving various groups of samurai performing on and around an outdoor stage. The brief was to extend the area behind the stage curtain for some of the action, as well as creating the surrounding Japanese environment. After the shoot, the production wanted to augment the crowd as well, so that at one point, all of the gathered samurai are digital. When Kai is finally beaten up, most of the samurai that come forward to surround him - and the camera - are digital doubles, and all of these had to look different to show that they come from different places. The extras shot for the base imagery were dressed quite simply and needed to be enhanced in distinctive ways into heavier, more complex assets. Their costumes also needed to be created with enough detail to catch the light convincingly. Like many of the set pieces for ’47 Ronin’, the tournament set was quite large, and most of the extension work here focussed on the surrounding landscape. Framestore as well as MPC created the environment work, each facility handling different portions of it. Occasionally, where overlaps occurred they would share elements. |
 |
|
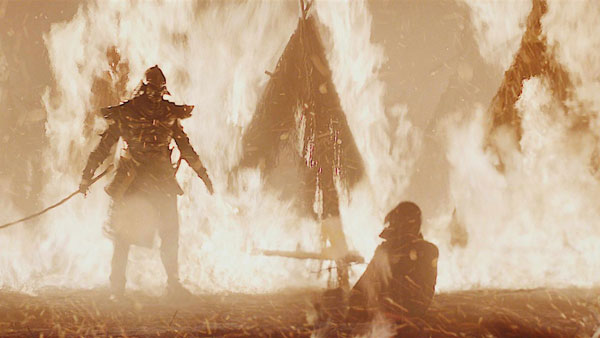
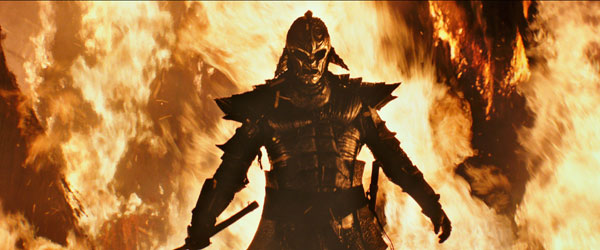
Another case of asset sharing was an essential, complex samurai model which Framestore had created, and on which MPC increased the resolution for use in this sequence. “The sharing process is quite straightforward now,” Nicolas explained. “Except for the proprietary tools, our facilities work in similar ways.” Ambush of FireA fiery night sequence, set in a wheat field, was also shot at Shepperton over two nights on a large set built with two haystacks. The scene depicts an ambush when the Ronin are surrounded and trapped inside a ring of blazing fire. Small gas fires were placed on set among the actors, controlled for safety, to help with interactive lighting. “But Carl wanted the fires in the final shots to be massive and everywhere at once – on all sides, in front of the actors and behind them,” Nicloas said. “The challenge is that 2D fire elements, which look best but are constantly moving, can be hard to work with, and we simply weren’t sure how far we could go with live action fire toward achieving the result he wanted. However, we made some tests first and found we could do this pretty successfully, and only reverted to CG fire where the camera work made it necessary, using elements from a simulation created by the FX team.” |
 |
|
On set, although the characters were meant to be surrounded by fire, only half of the circle was actually present in the plate – the rest had to be created because the camera continued to shoot in all directions to add to the feeling of being surrounded. “The result is extremely dramatic with a good sense of depth and heat. Our compositing team, led by Bronwyn Edwards, were the real heroes on this sequence. We relied on the compositors where extra interactive lights were needed, for rotoscoping characters and specific areas to place the fire correctly in 3D space and to do area-specific grading. All of this was done by hand.” They also followed an old school approach for the wheat field extensions. While this environment could have been partly or even entirely digital, they found they could use real photography very effectively. www.moving-picture.com |


