Digital Domain’s DDAI Brings AI-Integrated Infrastructure to Visual Storytelling
Digital Domain’s DDAI is specifically designed to meet the demands of film and episodic production, combining the precision of CGI pipelines with the expression of generative AI.
Digital Domain has appointed VFX Supervisor and Art Director Jelmer Boskma bringing credits on projects including Star Wars: Andor, Marvel's Eternals and Guardians of the Galaxy Vol. 2.
Autodesk’s Maya, 3ds Max and Arnold updates combine new AI features with improvements like a procedural RBD workflow for Bifrost and automated horse motion in MotionMaker.
Nuke 17.0 introduces native Gaussian Splat support, launches a new USD-based 3D system, expands machine learning capabilities, and extends its Machine Learning tools.
VFX studio JFX has expanded its senior creative leadership team with the appointment of Ingo Putze as VFX Supervisor and Jenn Epstein as Associate VFX Supervisor.
Digital Domain hired Pete Dionne as Visual Effects Supervisor, recognised for his technical expertise, creative leadership and strong record in digital creatures and complex CG environments.
Foundry’s acquisition of Griptape will help speed up its AI strategy by augmenting Foundry's AI-based features with orchestration capabilities for better customisation and control.
Katana 9.0’s native USD support gives lighting artists flexibility and control over lighting in USD workflows for scenes of any size, while maintaining data integrity all along the pipeline.
Maxon's new release of Cinebench is updated to the most recent Redshift Rendering engine and adds support for the new NVIDIA and AMD GPUs, and M4/M5 Apple Silicon processors.
Chaos Vantage's real-time feedback is now accessible in the viewport, speeding up layout, previs and lookdev for VFX and animation teams, alongside a new set of updates for V-Ray 7 for Houdini and Maya.
GenAI Generalist Sami Ling at Dimension Studio shares interesting ideas on the role of AI in filmmaking, particularly in virtual production, reflecting her experience gained at the studio.
Mari 7.5 has a new Multi-Paint feature developed as a collaboration between Foundry and Wētā FX, a Texture Transfer system, an expanded asset library and an Image Manager.
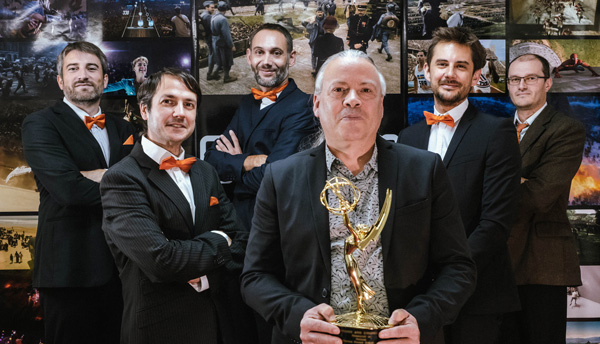
Golaem has been awarded an Engineering Emmy Award by the Television Academy for its software Golaem Crowd. Golaem Crowd helps artists to rapidly populate television shows, films and game cinematics by procedurally animating thousands of characters with life-like movement in real-time, while keeping artistic control.
Golaem functions support automatic navigation of characters, path planning and steering, including reactive collision avoidance, in order to create realistic human behaviours. These features have resulted in Golaem becoming a widely-used tool in CG character generation across the television industry.
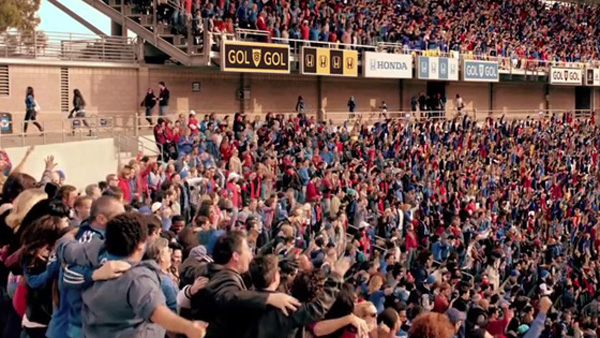
From its first use in Pan Am and Once Upon a Time TV shows by Zoic Studio, to The Walking Dead, Game Of Thrones and more recently Lovecraft Country, Golaem has accompanied the rise of visual effects and especially crowd creation in TV Shows. Golaem products have been recognised as having enabled creators to deliver their vision while respecting budgets and deadlines.
Golaem Crowd helps artists generate and animate a large number of characters in various styles and forms using behaviour building blocks such as procedural animation, path-planning and navigation as well as physics, hair/fur and cloth simulation.
Artists can adjust or layout a scene by moving characters on the fly with the help of procedural tools, adapting their feet to the ground or adding variety to their appearance and animation. With Golaem Layout, artists always have final control because at any time during the process they can give a character a custom appearance or manually take over the animation.
Golaem CEO Stéphane Donikian said, “Receiving this Engineering Emmy Award is a great honour, as it acknowledges once again the contribution Golaem made to the television industry. 2021 was a very special year for Golaem, and not only because of Covid. We recently celebrated Golaem Crowd’s 10 year anniversary, and we have the Golaem 8 release coming, which is the foundation for a whole new area of application for Golaem tools.”
The Golaem Team will accept the Emmy Award during the 73rd Engineering Emmy Awards ceremony on Thursday, 21 October 2021. golaem.com
Industrial Light & Magic has announced that Rob Coleman has rejoined the company as a Key Creative for Feature Animation at ILM’s Sydney studio. ILM also announced the return of Randal Shore, who will be rejoining the company’s Vancouver studio as an Executive Producer in Feature Animation.
Both Rob and Randal are joining at a critical stage of innovation at Industrial Light & Magic, overseen by Janet Lewin, who now leads ILM as both Senior Vice President and General Manager, alongside Rob Bredow, ILM’s Senior Vice President and Chief Creative Officer. With the recent expansion of ILM’s virtual production and StageCraft systems, as well as the fast growth of the company’s studios around the world, they are arriving at a pivotal time.
Rob Coleman in Sydney
“Rob Coleman has a long history at Industrial Light & Magic, having worked alongside George Lucas on the prequel trilogy, and Dave Filoni on The Clone Wars,” said Rob Bredow. “With a 35-year tenure in the industry, he is a terrific mentor and a powerhouse as an animation supervisor, with endless enthusiasm for the craft.
“In his new role, he will continue to deliver the unparalleled creativity that has continued to define him as a leader. Rob’s many years of creative supervision in animation make him the ideal fit for our upcoming projects, rejoining us as we work on multiple animated features in addition to a large number of visual effects shows. I’m so happy Rob is back – he typifies the best of what we do here at ILM.”
Rob Coleman, Key Creative for Feature Animation at ILM in Sydney.
Rob had a long, active history at ILM as an Animation Supervisor before focusing on work within Lucasfilm Animation. He was twice nominated for the Academy Award for his work on Attack of the Clones and The Phantom Menace, and received two BAFTA Awards for his work on Men In Black and The Phantom Menace.
Prior to this, Rob worked as an Animator on projects such as The Mask, The Indian in the Cupboard and Dragonheart, to name a few. He moved to Lucasfilm Animation in 2005 to work in development leadership on Star Wars: The Clone Wars. Most recently, he worked as an Animation Director at Dr. D. Studios on Happy Feet Two, and as Head of Animation at Animal Logic, supporting The LEGO Movie, The LEGO Batman Movie, and Peter Rabbit.
“I could not be more excited or humbled to be back at ILM,” said Rob. “In my time in animation, I’ve been lucky enough to work on some truly industry-defining films, but the pipeline of projects that ILM has ahead of it is exhilarating, and I’m thrilled to be a part of it.”
Randal Shore in Vancouver
During his tenure at Industrial Light & Magic, Randal Shore was the Executive in Charge of ILM’s Vancouver studio, playing an instrumental role in both launching the studio and managing its growth over the years, as well as working in executive leadership on No Time to Die, Jungle Cruise, Black Widow and The Mandalorian.
Before joining ILM, Randal held high-level positions at two other Canadian visual effects houses, The Moving Picture Company (MPC) and Prime Focus. At MPC, he was Head of Production overseeing films such as Life of Pi, which was awarded the Oscar for Outstanding Achievement in Visual Effects in 2013. During his tenure at Prime Focus as Executive Producer, he oversaw the company’s expansion from 45 artists to over 150, and worked on such films as Tree of Life and Tron Legacy.
Randal Shore, Executive Producer in Feature Animation at ILM, Vancouver.
“Every project Randal oversees benefits from his collaborative stewardship, and we’re thrilled that his journey has brought him back home to ILM,” said Janet Lewin. “His wide breadth of executive leadership and animation experience make him the perfect person to step into this new role. He will be developing and growing our Feature Animation strategy while partnering with our clients to guide their projects through to completion.”
Most recently, Randal was Head of Production for Tangent Animation where he oversaw the upcoming Maya and the Three for Netflix, bringing him back to his creative roots of producing animation. With Rob’s and Randal’s return to ILM, they will both play a key role in the company’s continued push into animation.
“I am absolutely thrilled to be back at Industrial Light & Magic,” said Shore. “We have some incredible feature animation projects in production, and I’m looking forward both to expanding our portfolio, and to working with our top class global studios.” www.ilm.com
Maxon has updated applications across the company’s Maxon One combined package of software tools. Cinema 4D Release 25 and Trapcode Suite 17 have new functionality and Redshift RT is introduced as a Public Beta version.
Among many updates, Cinema 4D R25 includes new user interface enhancements and a wide-ranging preset system for optimising workflows. New Spline Import options allow artists to use Illustrator, PDF and SVG vector artwork in 3D scenes, and new Spline and Data Integration functionality can be used to build Capsule Assets.
More Clarity, Less Distraction
The new UI in R25 reduces complexity to avoid distraction, adds new, clearer icons and makes the sliders more distinct. Layouts can adapt to the current mode, object or tool with the new Dynamic Palettes, laid out to optimise screen real-estate and put the relevant tools in reach.
R25 Interface enhancements
New browser-like tabs at the top of the Cinema 4D window help switch between open documents or key layouts. Layout switching on multi-monitor displays is more consistent, and the width or height of layout elements can be maintained while switching resolution. Number fields in the Cinema 4D R25 Attribute Manager now work as virtual sliders. Users interactively adjust the values by clicking-and-dragging over the fields, or using the up and down arrow keys to increment the place value.
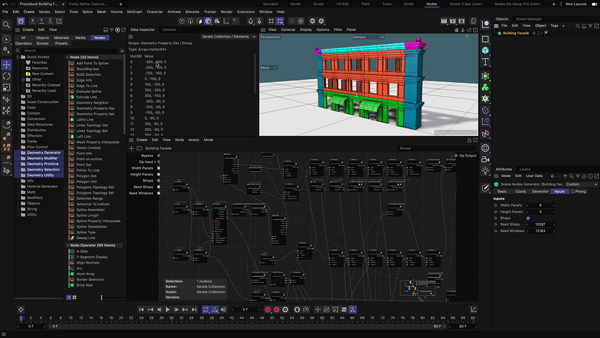
Capsules and Capsule Objects
Capsules are a new way to use Cinema 4D's Scene Node system. Capsule Assets constructed in the Scene Nodes core work like procedural plugins, and can be used directly in Cinema 4D's Classic Object Manager as primitives, generators or geometry modifiers – within the same hierarchy.
Capsule Assets
Five types of capsule objects can be used this way. The object group works like a generator, the geometry modifier group act as deformers, the selection modifier group procedurally creates and modifies component selections for procedural polygon modelling, the mesh primitive group allows you to create your own primitive mesh objects and the spline primitive group creates primitive splines. Each object has its own node graph. Parameters from the node set-up can be exposed and edited. So, now you can combine regular workflows with scene nodes.
Vector Artwork
Spline Import updates allow users to import vector artwork from Adobe Illustrator, PDF and SVG files to use in 3D scenes. For example, splines are imported from Adobe Illustrator files saved with PDF compatibility, supporting symbols and gradient-filled shapes as well. Vector art stored in the SVG format can also be imported. Vector artwork is automatically converted to 3D, with options to offset paths and layers in 3D space, define extrudes and sweeps to represent filled and stroked paths, and replace or reload artwork.
Data Integration
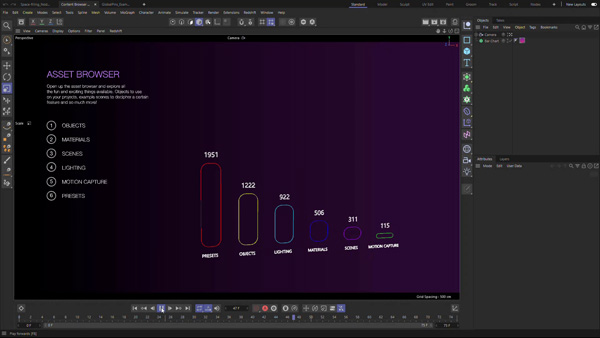
Asset Management
A new Asset Browser gives access to searchable libraries of preset content stored locally or online, including a collection of 3D objects, materials and node capsules available to Cinema 4D subscribers. The assets have rich metadata and keywords, and are cached locally for re-use. You can also add favourite keywords yourself, and save frequent searches in smart folders for those words.
In the Asset Browser, presets for objects, tags, materials, tools and other Attribute Manager elements are stored, specifying defaults and recalling presets for each element via a drop-down menu. Dedicated presets can include gradients, colour swatches, cap profiles and other elements.
A searchable palette of common assets can be placed directly in Cinema 4D layouts, and individual assets, folders or smart searches added to icon palettes. Assets will be immediately added to the scene, with a pop-up Browser window for the searches and folders. Asset Versioning, useful in complex pipelines, is available, and object-based assets may be inserted as objects, Instances or References for flexibility and efficiency.
Scene Manager and Scene Nodes
Cinema 4D’s upcoming Scene Manager, still in progress, uses node-based assets to construct procedural geometry or an entire scene in a hierarchy-based view. Eventually the Scene Manager workflow will allow you to integrate Classic Cinema 4D objects by dragging them into the Scene Manager. Everything done within the Scene Manager also creates a corresponding node graph within Scene Nodes, so you can choose the best workflow for your job.
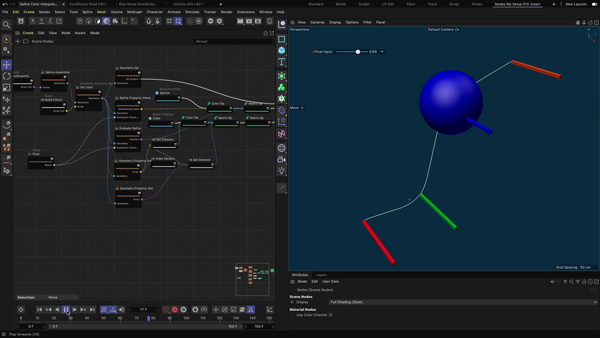
Scene Nodes
Users can manage relationships and dependencies between objects, construct and modify geometry, and build reusable assets with the Scene Node core, as well as debug scene node systems.
For TDs, the main value of Scene Nodes is the ability to expand the potential of a system without using any code. Support for splines in the Scene Nodes core makes it possible to assemble linear, bezier, b-splines and NURBs splines. Properties like colour, weight and normal can be assigned to points and the interpolated position, tangent and values can be retrieved along the spline. Also, new Spline Primitive assets can be created with the spline primitive group (see Capsules).
Supporting data integration, CSV files can be imported and used in Scene Nodes setups for rich 3D data visualisations. Capsule assets have various data visualisation options that can be applied to any data. Values can be passed into Scene Node setups with a new Command Line Argument node, rendering dynamic content without opening Cinema 4D.
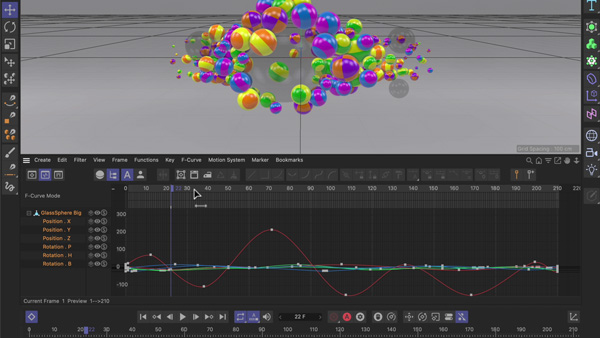
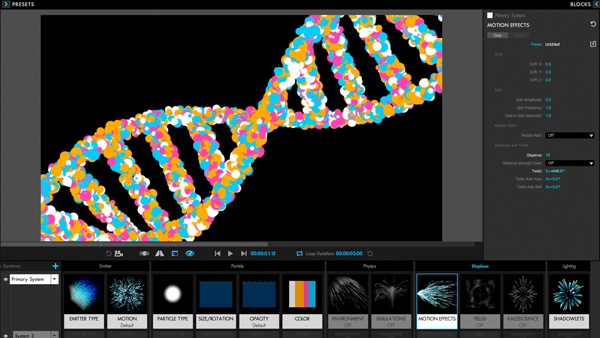
Trapcode 17 Particular and Form
Disperse & Twist
Trapcode 17 now makes it possible to work with Particular and Form in the same 3D space by bringing some Form behaviours to Particular, including Kaleidospace, Disperse & Twist and Distribution, and vice-versa. The release also upgrades the Flocking simulation, which has new On Predator/Prey Contact and Team designations. Users can select more than one particles system at a time in the Designer to apply commands to, Spherical Field and Turbulence Field have new 3-axis controls, and new Emitter Behaviours can now be applied to immortal particles.
Z Buffer Group
Form now shares Z Buffer Group and Obscuring Layers with Particular, for working with 3D and depth layers. Audio React and Layer Maps are now available in all eight base forms. Two colour randomisation tools, Color Random and Random from Gradient, are available and, as in Particular, the Create Null button automatically creates a Null in a composition.
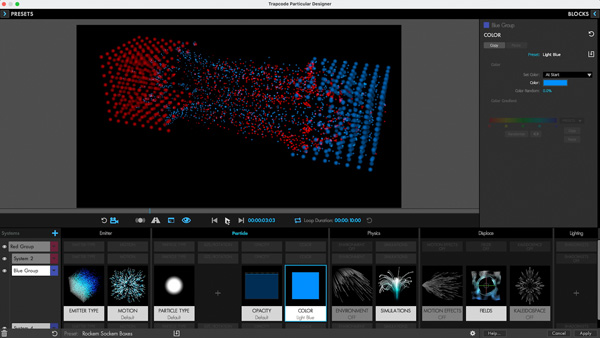
Colours can now be labelled in Particular
All Trapcode tools – Particular, Form and MIR – now support Adobe multi-frame rendering, still in Beta, which allows applications to take advantage of multi-core CPUs to improve export and preview rendering performance. Multi-Frame Rendering impacts your project’s render speed based on the number of CPU cores available in your computer, available RAM and graphics card compute power. Adobe multi-frame rendering also improves performance for Previews for a more fluid user experience.
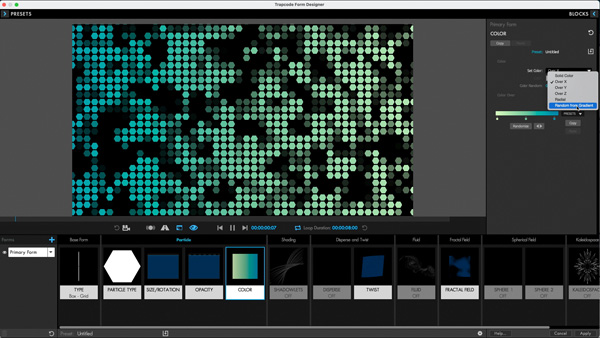
Colour Random from Gradient
Redshift Subscription and Redshift RT
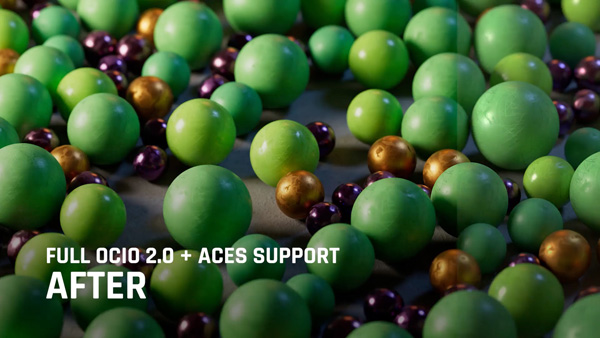
Because Redshift is now available as a subscription product only, new features and updates have been delivered throughout the year. These include macOS compatibility via support for M1-powered Macs and Apple’s Metal Graphics API. Greater support for OpenColorIO (OCIO) v2 has resulted in more accurate, cinematic colour through the use of ACES and other custom colour profiles, and a 3ds Max OCIO colour picker.
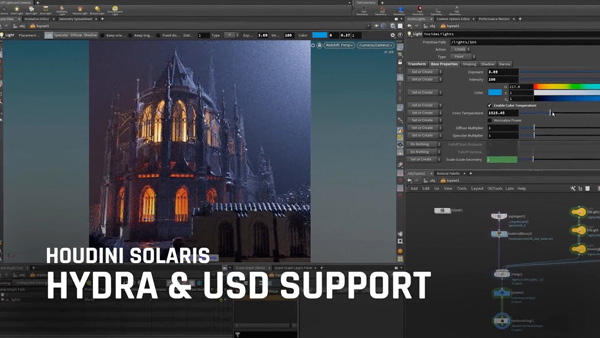
Redshift now supports Houdini Solaris Hydra, USD and Houdini viewport rendering. For looks, artists now have a Multiscatter hair shader, new microfacet sheen BRDF and improved dispersion and caustics. DeepEXR volumetric support, open shading language (OSL)support including closures and Tyflow support for 3ds Max are added as well. As well as a new UI, Redshift has Cinema 4D VIPR viewport rendering, a new scalar curve utility node and UV projection node, and a new Blender 3D plugin.
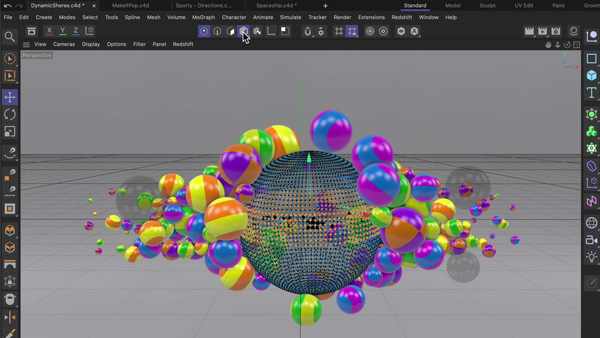
The new Redshift RT rendering mode has completed its alpha stage and entered public beta. Redshift RT mode achieves near real-time rendering performance using the same shaders and lights. It co-exists with the standard Redshift render engine in the same DCC and scene, without affecting efficiency. Artists can use it during development of a project or even at final render if the project does not need the same level of fidelity as standard Redshift. www.maxon.net
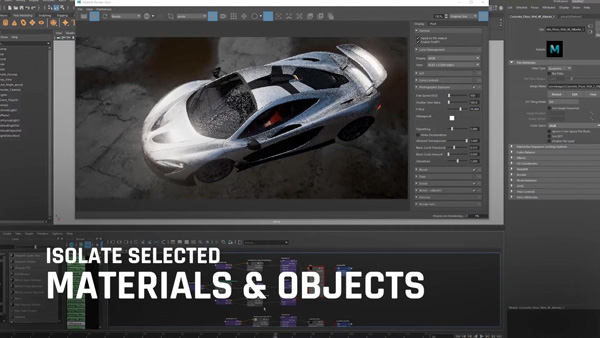
It's now possible to select and isolate materials in Redshift.
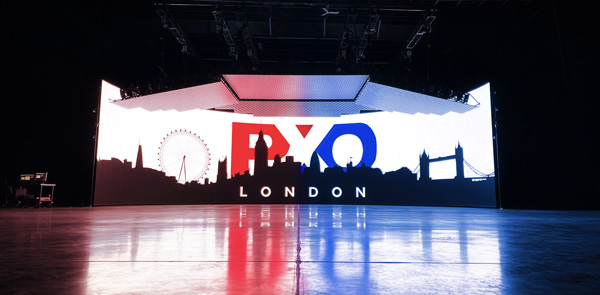
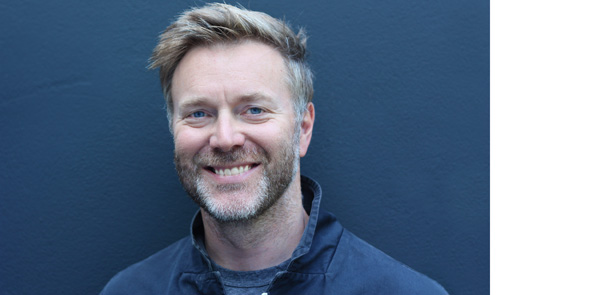
VFX and virtual production studio Pixomondo is launching a London division in September and has appointed Alex Webster as its Head of Studio.
Most recently working as Managing Director of Framestore Pre-Production Services in London, Webster will focus on facilitating the growth of Pixomondo’s virtual production services in Europe, working with the company’s wider management team.
Pixomondo (PXO) currently has three LED volumes either fully operational or under construction in Canada, located in Vancouver and Toronto and operated in conjunction with production equipment rental specialist William F. White International.
Potential locations for the new UK facility are under review pending client consultations. It will be closely integrated with PXO’s existing German operations, located in Frankfurt and Stuttgart.
VP and Visualisation
Alex Webster said, “Over the last few years I have witnessed first-hand the speed with which the integration of VP with visualisation is reshaping the VFX industry. PXO is driving innovation in this space and making VP central to its workflow, becoming one of the most agile and creative studios working in the industry today. I’m thrilled to be working in close collaboration with the whole PXO team to design and build a state of the art integrated VP studio, which will combine teams in concept art, previs, virtual art and in-camera VFX with a brand-new LED volume in the UK.”
Alex Webster, Pixomondo Head of Studio
At Framestore, Alex built FPS, the company’s pre-production division, to more than 120 employees, specializing in previsualisation, virtual production, techvis and postvis for clients in film, episodic and experiential media. Prior to that he was Managing Director of The Third Floor London and Executive Producer at VFX boutique Electric Theatre Collective, where he established its sister production company Friends Electric.
Alex’s earlier beginnings include the roles of Deputy Head of Production at MPC, Head of Content at The Mill, where he spearheaded original content creation as part of Mill+ and Managing Director of animation studio Passion Pictures, overseeing the company’s operations in London and New York.
Centre of Excellence
Jonny Slow, PXO CEO said, “We could not be more excited to be welcoming Alex to the PXO team as we continue to roll out our growth plans. We have our roots in Europe, and Germany remains a central and crucial part of our VFX production and artistry capabilities. Adding a London presence to complement this strong foundation, focused on virtual production and run by Alex, will ensure that we can continue to expand our offering to clients, and service the significant amount of demand for these services in the UK and Europe.
“London is second only to Los Angeles for physical production services and home to a significant number of hugely talented crew, experienced in high-end TV and film production. Virtual production demands that we locate ourselves close to these facilities and talent. A significant push during 2020 from the UK Department of International Trade to make the UK a virtual production Centre of Excellence, as well as investment from Mayfair Equity Partners, has allowed this part of our plan to be accelerated. I very much look forward to working with Alex in the years to come.”
Jonny recently relocated back to London to assist with the launch after almost a decade in Los Angeles and three years at PXO.
The London launch represents the latest step in PXO’s push to grow interactive pre-production services for large feature and episodic projects. By working closely with producers from the first stages of the art process, PXO develops value for productions, supports filmmakers’ efforts to innovate, while delivering cost-effective results more rapidly, and with less risk.
Allen Simpson, Acting Chief Executive at London & Partners, the business growth and destination agency for London, said, “We are thrilled Pixomondo has chosen to expand their European operations to London. The UK capital is home to a thriving film and TV production industry, including a host of cutting-edge companies at the forefront of innovation in visual effects and virtual production. Investments from companies like Pixomondo are a testament to London’s position as a global hub for creative industries and we look forward to welcoming them to the city.” www.pixomondo.com
Visual effects studios MPC and Mikros have formed an alliance of their episodic and film divisions. Mikros, a French company with over 35 years in the visual effects industry, has been a Technicolor brand since 2015.
The combined studios will operate under the MPC Episodic brand and will continue to make PreProduction and VFX services available to the French features and episodic market, and beyond.
The strategic move to integrate Mikros’ episodic and film division with MPC Episodic bolsters MPC Episodic’s market presence as a full-service global VFX studio, adding to its established studios in Berlin, London, Los Angeles and Bangalore. Meanwhile, Mikros Animation and Mikros Advertising will remain as they are.
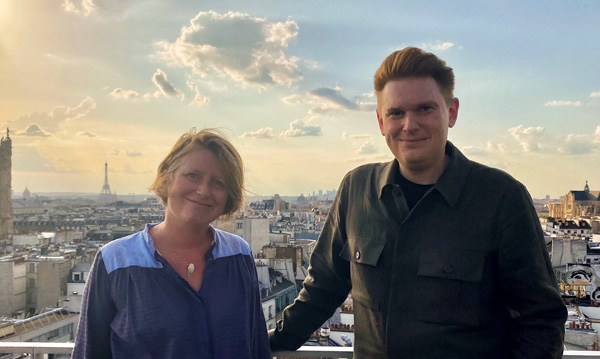
The Paris and Liège based Mikros studios are headed by MD – France and Belgium, Béatrice Bauwens, previously MD at Mikros VFX. Recent film and TV projects by the studios include ‘Into the Night’, ‘Lupin’, ‘Aline’, ‘The Forgotten Battle’ and ‘Annette’, which opened the Cannes Film Festival on 6 July.
“Bringing our creative and technical expertise to projects and getting involved with filmmakers to bring solutions has always been our driving force,” Béatrice Bauwens said. “We share with the MPC teams the same passion to find solutions that best serve the stories. The association of Mikros VFX and MPC Episodic is a great opportunity for the teams to have access to the world's highest technology and an exceptional community of talent for the benefit of our clients in Paris and Liège. We are proud to bring our French and Belgian touch to the MPC brand.”
MPC Episodic’s Global MD Tom Williams said, “I’m delighted to welcome the incredible talent of the Mikros VFX team. Joining forces affirms our commitment to provide the best VFX talent and technology to our clients anywhere in the world. France has a rich history of filmmaking and we are honoured to have the opportunity to work within the French market and offer our international clients access to the wealth of talent available in Paris and Liège, as well as more VFX production tax rebate options.”
Since its launch in January 2020, MPC Episodic has seen exponential growth, attracting some of the industry’s best creative talent including Executive VFX Supervisor Pete Jopling (The Third Day, Battleship), Executive VFX Producer Christopher Gray (The Witcher, The Boys), VFX Supervisor David Sewell (Chernobyl, Les Misérables) and VFX Supervisor Sheila Wickens (Doctor Who, Big Little Lies). MPC Episodic has since completed work for Sky / HBO’s series ‘The Third Day’, Warner Bros. Television’s ‘Pennyworth’ and ‘Lisey’s Story’ and is working with clients including AppleTV+, Bad Robot, BBC Studios and Amazon Studios. www.mpcepisodic.com